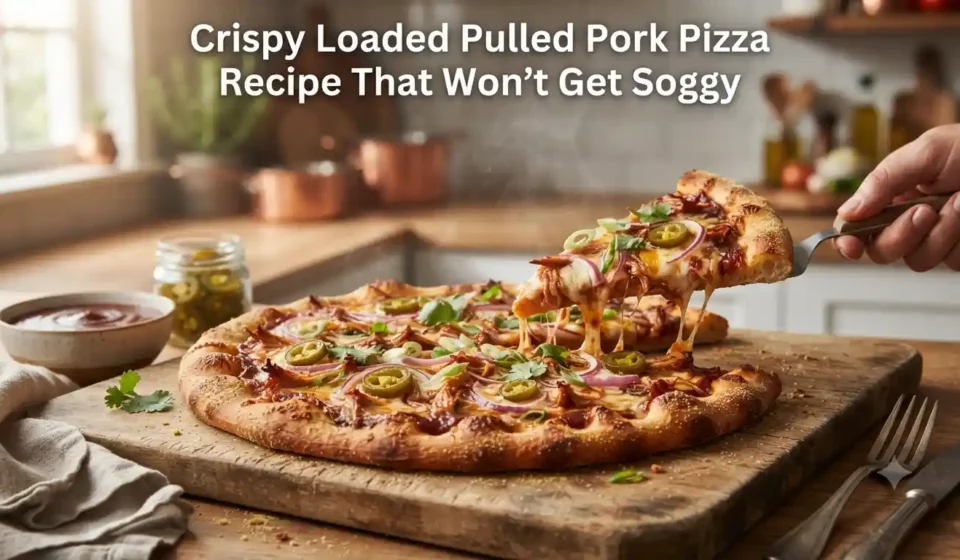

There’s something deeply satisfying about turning a pile of tender pulled pork into a bubbling, crisp-edged pizza. Maybe it’s the smell of barbecue sauce hitting a hot crust, or the promise of melted cheese after a long day. Either way, homemade pizza has a way of pulling everyone into the kitchen before it even reaches the table.
The tricky part is moisture. Pulled pork, barbecue sauce, and cheese can turn a perfectly good crust soft and soggy if they’re piled on carelessly. This recipe fixes that with a hot oven, a light hand with sauce, well-drained pork, and smart layering. You get a crisp base, juicy pork, caramelized edges, and plenty of cheesy goodness.
Prep & Cook Time
| Details | Time / Amount |
|---|---|
| Prep Time | 20 minutes |
| Cook Time | 12–15 minutes |
| Total Time | 32–35 minutes |
| Servings | 4 |
| Pizza Size | 12-inch pizza |
For the crispiest crust, allow extra time to preheat your oven and pizza stone or steel thoroughly. That preheating time makes a bigger difference than many home cooks expect.
What Equipment Do You Need?
You don’t need a professional pizza oven. A few basic tools will do the job:
- Large baking sheet, pizza pan, pizza stone, or pizza steel
- Parchment paper, if needed
- Rolling pin or clean hands for stretching the dough
- Cutting board
- Sharp knife
- Measuring cups and spoons
- Mixing bowl
- Spoon or pastry brush for spreading sauce
- Pizza cutter or chef’s knife
- Oven mitts
Chef’s note: A pizza steel or stone gives you the crispest bottom because it transfers intense heat directly into the dough. A preheated baking sheet is a perfectly workable alternative.
Ingredients
For the Pizza
- 1 lb (450 g) pizza dough, room temperature
- 1 tablespoon olive oil
- ⅓ cup (80 ml) thick barbecue sauce
- 1½ cups (about 225 g) cooked pulled pork, excess liquid drained
- 1½ cups (170 g) low-moisture mozzarella, freshly shredded
- ½ cup (55 g) sharp cheddar cheese, shredded
- ¼ small red onion, very thinly sliced
- ¼ cup (35 g) sliced pickled jalapeños, well drained
- 2 tablespoons sliced green onions
- 1 tablespoon chopped fresh cilantro, optional
- ¼ teaspoon garlic powder
- ¼ teaspoon smoked paprika
- 1 tablespoon cornmeal or semolina, optional, for the pizza peel or pan
Optional Finishing Toppings
- 1–2 tablespoons barbecue sauce for a light drizzle
- Extra green onions
- Fresh cilantro
- Crushed red pepper flakes
Why Each Ingredient Matters
| Ingredient | Why It Matters |
|---|---|
| Pizza dough | Provides the chewy structure and crisp base that holds the heavy toppings. |
| Olive oil | Helps the crust brown and creates a slight moisture barrier between the dough and sauce. |
| Thick barbecue sauce | Adds sweetness, acidity, smoke, and moisture without flooding the crust. |
| Pulled pork | Brings rich, savory flavor and makes the pizza satisfying enough for dinner. |
| Low-moisture mozzarella | Melts beautifully while releasing less water than fresh mozzarella. |
| Sharp cheddar | Adds stronger cheesy flavor, color, and richness. |
| Red onion | Cuts through the richness with sweetness and a little bite. |
| Pickled jalapeños | Their acidity balances the pork and cheese while adding gentle heat. |
| Garlic powder | Adds savory depth without introducing extra moisture. |
| Smoked paprika | Reinforces the barbecue flavor with subtle smokiness. |
| Green onions | Add fresh onion flavor after baking without weighing down the pizza. |
The most important moisture-control choices are thick sauce, drained pork, low-moisture cheese, and drained jalapeños. Wet toppings are the fastest route to a soggy homemade pizza.
Step-by-Step Instructions
Step 1: Heat the Oven and Pizza Surface
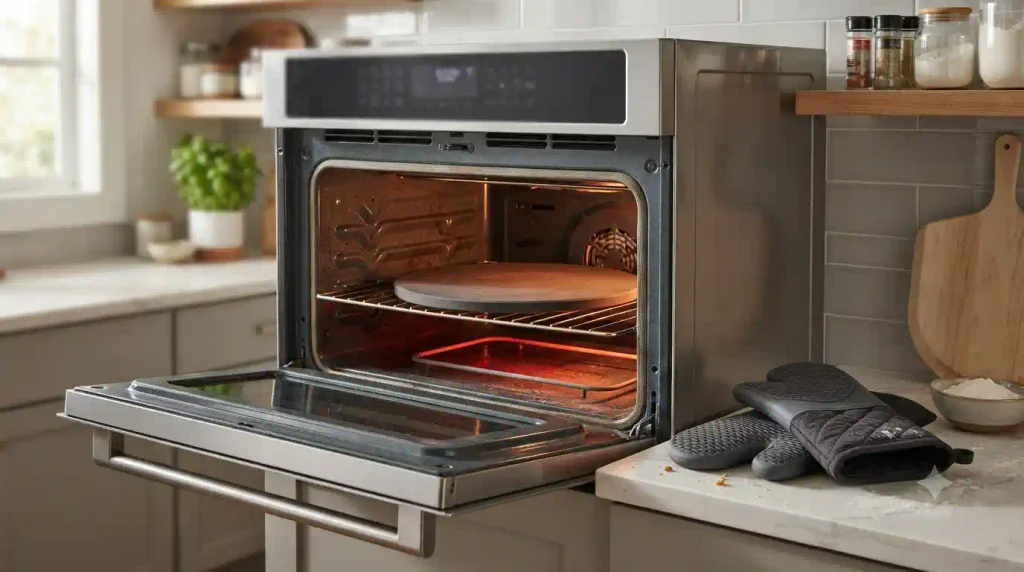
Place a pizza stone, pizza steel, or heavy baking sheet in the oven and preheat to 500°F (260°C), or the highest safe temperature recommended for your equipment.
Let the stone or steel heat for at least 30–45 minutes if possible. A hot oven alone isn’t enough—the baking surface needs time to store heat.
If your oven only reaches 475°F (245°C), that’s fine. The pizza may simply need an extra minute or two.
Be careful when working around the preheated stone or steel. It will be extremely hot.
Step 2: Remove Excess Moisture From the Pork
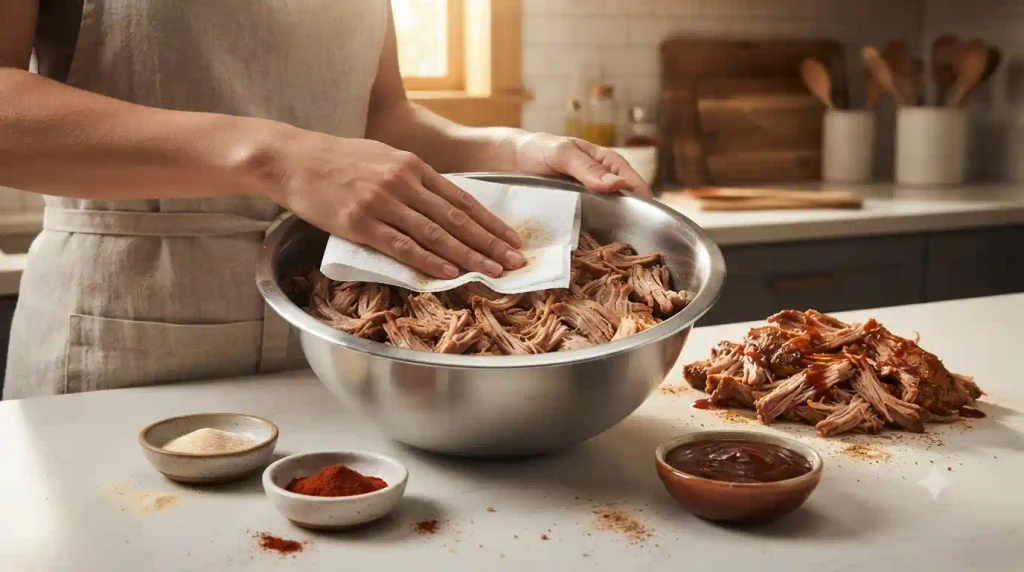
Put the cooked pulled pork into a bowl. If it has been sitting in cooking liquid or barbecue sauce, drain it well.
Use paper towels to gently blot especially wet pork. You don’t want to dry it out completely; you’re simply removing liquid that would otherwise soak into the crust.
Toss the pork with:
- ¼ teaspoon garlic powder
- ¼ teaspoon smoked paprika
- About 1 tablespoon barbecue sauce, only if the pork isn’t already sauced
The pork should look moist and glossy, not swimming in sauce.
If using refrigerated leftover pork, reheat it until steaming hot before or during preparation as appropriate, and follow safe storage practices for leftovers.
Step 3: Stretch and Prepare the Dough
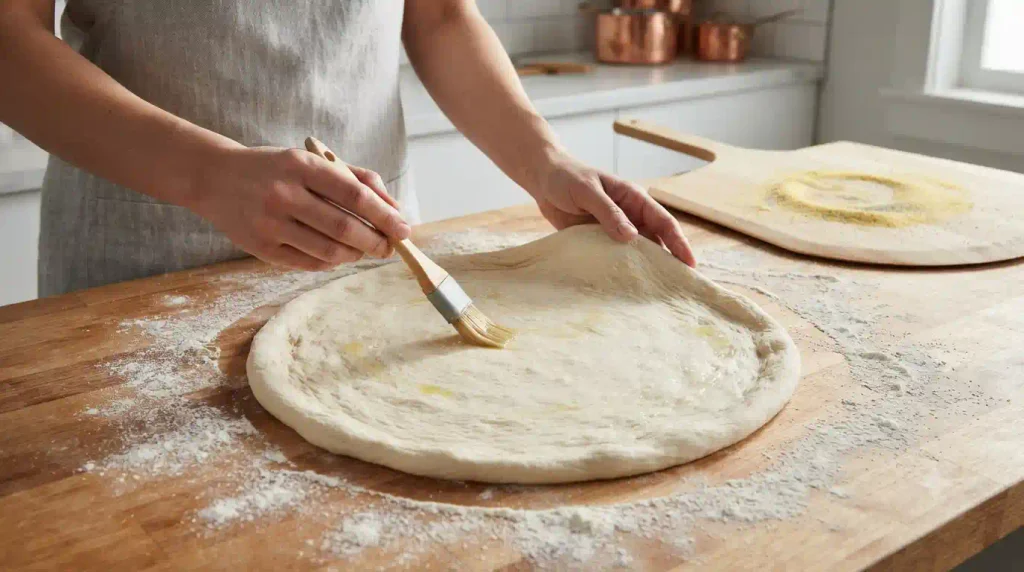
Place the room-temperature pizza dough on a lightly floured surface.
Stretch or roll it into roughly a 12-inch circle. Aim for a relatively thin center while leaving a slightly thicker rim.
Don’t fight dough that keeps shrinking back. Leave it alone for 5–10 minutes, then continue stretching. The gluten often just needs a chance to relax.
Brush the surface lightly with 1 tablespoon olive oil, especially around the outer crust.
If transferring the pizza with a peel, sprinkle the peel lightly with cornmeal or semolina before placing the dough on it.
Step 4: Layer the Pizza Without Overloading It
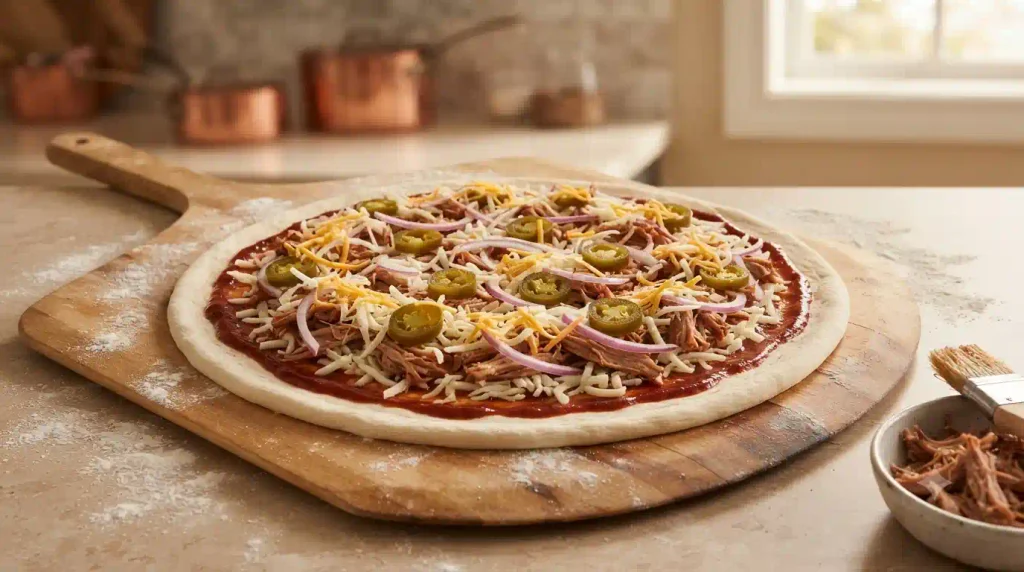
Spread ⅓ cup barbecue sauce over the dough, leaving approximately a ½-inch border.
Resist the temptation to add another big spoonful. Too much sauce is one of the main reasons loaded pizzas turn soggy.
Add the toppings in this order:
- About half the mozzarella
- Pulled pork
- Red onion
- Drained jalapeños
- Remaining mozzarella
- Cheddar
Spread everything evenly rather than building a thick mound in the center.
Kitchen reality check: It may look like you could squeeze another cup of pork onto the pizza. Don’t. Save it for sandwiches tomorrow. An overloaded pizza traps steam instead of letting the crust crisp.
Step 5: Bake Until Crisp and Bubbling
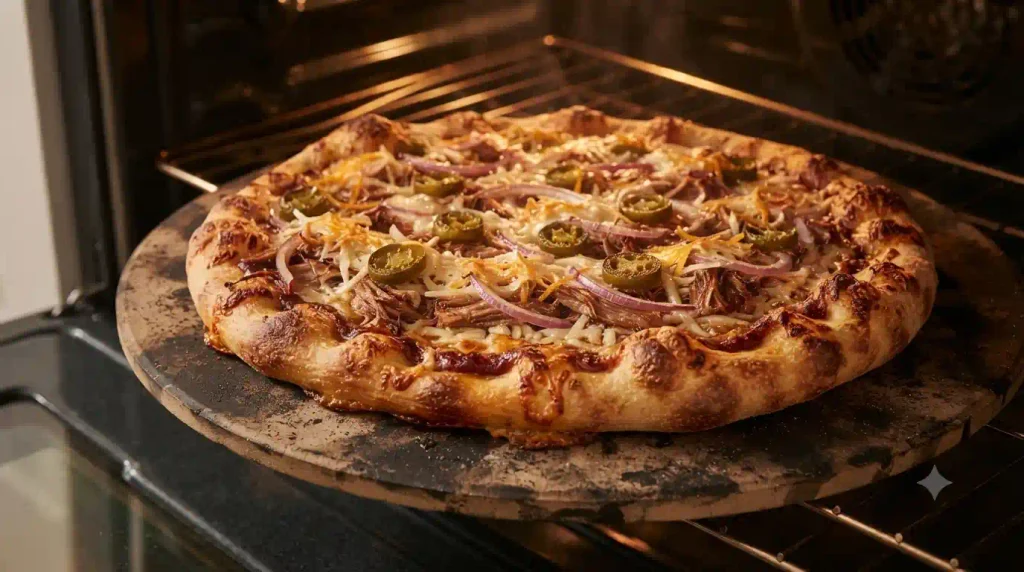
Carefully transfer the pizza to your preheated stone, steel, or baking sheet.
Bake for 10–15 minutes, depending on your oven and baking surface.
Look for three signs rather than relying only on the clock:
- Cheese is fully melted and bubbling.
- Outer crust is deeply golden.
- Bottom of the pizza feels firm and has browned spots.
If the cheese is done but the bottom needs more color, give the pizza another minute or two while watching it closely.
Avoid reaching into a hot oven without proper oven mitts.
Step 6: Rest, Finish, and Slice
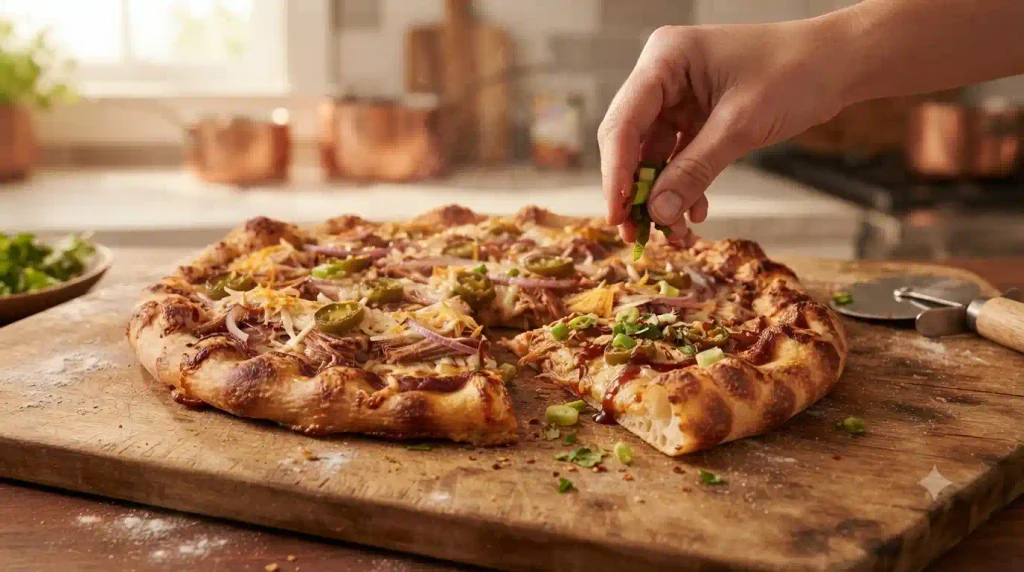
Remove the pizza from the oven and let it sit for 3–5 minutes before cutting.
This short rest matters. Cutting immediately allows hot cheese, pork juices, and sauce to run across the crust.
Finish with green onions, cilantro, crushed red pepper, or a very light barbecue sauce drizzle.
Slice into 8 pieces and serve while the crust is still crisp and the cheese is warm.
Health Benefits
Loaded pulled pork pizza is comfort food, but it can still contribute useful nutrients when portions and toppings are balanced.
- Pulled pork provides protein, which supports muscle maintenance and helps make the meal satisfying.
- Cheese supplies protein and calcium, although it also contributes saturated fat and sodium.
- Red onion provides small amounts of fiber and plant compounds.
- Jalapeños add flavor with very few calories, making them an easy way to increase intensity without piling on more cheese or sauce.
- Using a moderate amount of sauce helps control added sugar and sodium.
- Adding vegetables such as bell peppers, mushrooms, or extra onions can increase the pizza’s volume and variety of nutrients.
For a more balanced dinner, serve 1–2 slices with a large salad or roasted vegetables rather than relying on pizza alone.
Nutrition Information (Per Serving)
The following values are estimates for ¼ of the pizza (approximately 2 slices). Exact nutrition varies considerably with the dough, barbecue sauce, pork, cheese, and portion sizes used.
| Nutrient | Approximate Amount |
|---|---|
| Calories | 650 kcal |
| Protein | 35 g |
| Fat | 27 g |
| Carbohydrates | 67 g |
If you need precise nutrition information for dietary or medical reasons, calculate it using the exact brands, ingredient weights, and serving sizes you use.
Pro Tips & Variations
1. Drain everything wet.
Pulled pork, pickled jalapeños, and any additional vegetables should be drained before they touch the dough.
2. Choose low-moisture mozzarella.
Fresh mozzarella tastes wonderful, but its higher water content makes a heavily topped barbecue pizza harder to keep crisp.
3. Don’t drown the pizza in barbecue sauce.
For a 12-inch pizza, ⅓ cup is usually enough. Put extra sauce on the table instead.
4. Preheat the baking surface.
A cold sheet pan slowly warms the dough. A blazing-hot surface starts setting and browning the bottom almost immediately.
5. Keep the center relatively thin.
A thick center covered with heavy pork and cheese takes longer to cook and can stay doughy.
6. Try a spicy version.
Add fresh jalapeño, crushed red pepper, or a small drizzle of hot sauce after baking.
7. Make it smoky.
Use smoked cheddar or smoked mozzarella for part of the cheese.
8. Add vegetables carefully.
Bell peppers and mushrooms work well, but sauté watery vegetables first so they don’t release moisture onto the pizza.
9. Try chicken instead.
Leftover shredded barbecue chicken is an easy substitute for pulled pork.
10. Reheat it properly.
Skip the microwave if crispness matters. Reheat slices in a dry skillet over medium-low heat or in a 375°F (190°C) oven until hot.
How Much Does It Cost to Make?
Prices vary by supermarket, region, brand, and whether you’re using leftover pulled pork, but here’s a reasonable US-style estimate.
| Ingredient | Estimated Cost |
|---|---|
| Pizza dough | $2.00 |
| Pulled pork | $4.00 |
| Mozzarella | $2.00 |
| Cheddar | $0.75 |
| Barbecue sauce | $0.60 |
| Red onion | $0.25 |
| Jalapeños | $0.50 |
| Green onions & cilantro | $0.60 |
| Oil & seasonings | $0.30 |
| Estimated Total | $11.00 |
That works out to roughly $2.75 per serving when serving four.
Using homemade dough and leftover pulled pork can bring the cost down further.
Frequently Asked Questions
Why does my pulled pork pizza get soggy?
Usually, there is simply too much moisture. Wet pulled pork, excessive barbecue sauce, fresh mozzarella, watery vegetables, and an insufficiently heated baking surface can all contribute.
Drain the pork, use thick sauce sparingly, choose low-moisture mozzarella, and bake the pizza on a thoroughly preheated surface.
Should I cook pulled pork before putting it on pizza?
Yes. This recipe uses fully cooked pulled pork. Pizza’s short baking time isn’t intended to safely slow-cook raw pork.
Leftover pulled pork is ideal. If you’re using refrigerated leftovers, make sure they’ve been stored safely and reheat them appropriately.
Can I make pulled pork pizza ahead of time?
You can prepare the individual components ahead, but don’t fully assemble the pizza hours in advance. Sauce and moist toppings will gradually soak into raw dough.
Instead, refrigerate the prepared toppings separately and assemble the pizza immediately before baking.
What cheese goes best with pulled pork pizza?
A combination of low-moisture mozzarella and sharp cheddar works particularly well. Mozzarella gives you that classic stretchy pizza texture, while cheddar stands up to the bold barbecue pork.
Smoked Gouda, Monterey Jack, or pepper Jack can replace some of the cheddar if you want to change the flavor.
Final Thoughts
A great pulled pork pizza isn’t about adding as much meat, cheese, and sauce as the crust can physically hold. It’s about controlling moisture and getting enough heat underneath the dough.
Drain the pork, keep the barbecue sauce restrained, use low-moisture cheese, and give your baking surface plenty of time to preheat. Those small choices are what turn a potentially soggy leftover dinner into a crisp, smoky, cheesy pizza worth making again.
And if your first homemade pizza isn’t perfectly round? That’s part of the fun. Once those crisp edges and bubbling cheese hit the table, nobody is reaching for a ruler.