

Duck legs are one of those wonderfully forgiving cuts that make a home kitchen smell like something special. When the skin turns deeply golden and crisp while the meat becomes so tender it nearly falls from the bone, it is hard to believe the recipe is this simple. If you have been craving a cozy roast dinner without tackling a whole duck, this is the recipe to make.
The secret is giving the duck enough time for its fat to slowly render and the meat to soften before finishing it at a higher temperature. You do not need fancy equipment or complicated techniques. A roasting pan, a few everyday seasonings, and a little patience are enough to turn humble duck legs into a restaurant-worthy dinner.
Prep & Cook Time
| Details | Time |
|---|---|
| Prep Time | 10 minutes |
| Cook Time | 2 hours |
| Total Time | 2 hours 10 minutes |
| Servings | 4 |
Oven Temperature: Start at 350°F (175°C) and finish at 425°F (220°C).
What Equipment Do You Need?
You only need a few basic kitchen tools:
- Large roasting pan or oven-safe baking dish
- Wire rack that fits inside the roasting pan, if available
- Small bowl for mixing seasonings
- Sharp knife
- Paper towels
- Tongs
- Instant-read meat thermometer
- Pastry brush or spoon for basting
- Aluminum foil, if needed for resting
A wire rack is helpful because it allows the rendered duck fat to drip away from the legs, helping the skin crisp more evenly. If you do not have one, simply place the duck legs directly in the roasting dish.
Ingredients
- 4 duck legs, about 10–12 ounces each
- 1 ½ teaspoons kosher salt
- 1 teaspoon garlic powder
- 1 teaspoon dried thyme
- ½ teaspoon freshly ground black pepper
- ½ teaspoon smoked paprika
- ½ teaspoon onion powder
- 1 tablespoon olive oil, optional
- 4 garlic cloves, lightly crushed
- 1 small sprig fresh rosemary
- ½ cup chicken stock or water
Optional finishing ingredients
- 1 teaspoon honey, for a lightly sweet glaze
- 1 teaspoon Dijon mustard, for extra tang
- 1 teaspoon fresh lemon juice, to brighten the finished dish
- Fresh parsley or thyme, for garnish
Chef’s note: Duck is naturally rich and releases plenty of fat as it cooks, so you do not need much added oil. In fact, if the skin is already moist, you can skip the olive oil entirely.
Why Each Ingredient Matters
Duck legs:
Duck legs contain more connective tissue and fat than duck breast. Slow roasting gives that connective tissue time to break down, resulting in meat that is rich, tender, and juicy.
Kosher salt:
Salt does more than season the surface. It helps draw out excess moisture from the skin, which is especially useful when you want crisp roasted duck skin.
Garlic powder:
Garlic powder gives even seasoning without creating large pieces of fresh garlic that can burn during the high-temperature finishing stage.
Dried thyme:
Thyme adds an earthy, slightly minty flavor that works beautifully with rich duck.
Black pepper:
Its gentle heat cuts through the richness and adds a familiar roasted flavor.
Smoked paprika:
A small amount brings subtle smokiness and gives the skin an attractive warm color.
Fresh garlic and rosemary:
These aromatics perfume the duck as it roasts. They are tucked into the pan rather than piled on top, so they can flavor the cooking juices without burning.
Chicken stock or water:
A small amount of liquid keeps the bottom of the pan from scorching during the long roast. It also helps create flavorful juices that can be used for serving.
Honey, Dijon, and lemon:
This optional combination creates a sweet, tangy finish. The acidity from the lemon and mustard is particularly helpful for balancing duck’s natural richness.
Step-by-Step Instructions
Step 1: Dry and Season the Duck Legs
Preheat your oven to 350°F (175°C).
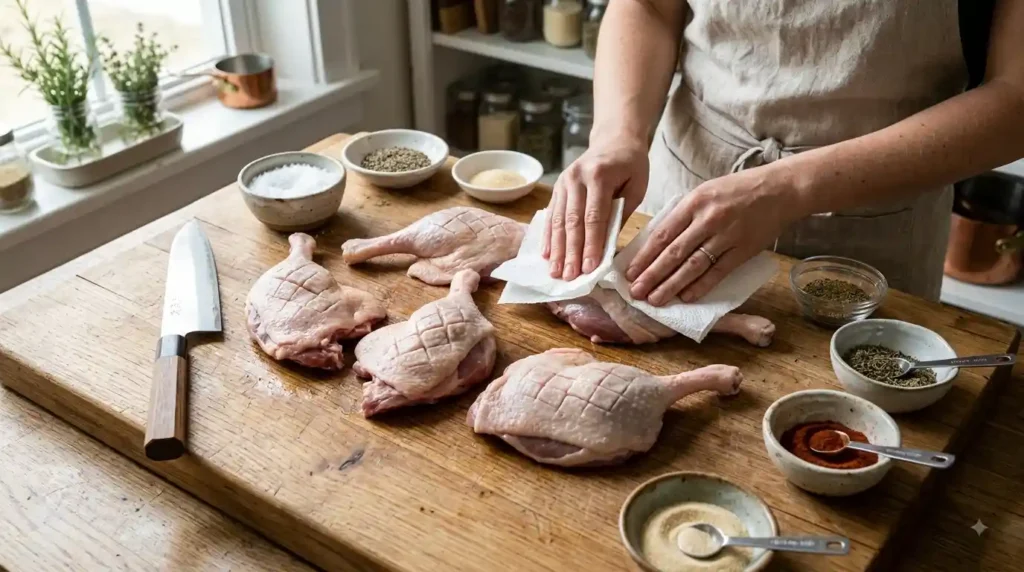
Pat the duck legs very dry with paper towels. This step matters more than it seems. Moisture on the skin creates steam, and steam is the enemy of crisp skin.
Using a sharp knife, lightly score the skin in a shallow crosshatch pattern. Do not cut deeply into the meat. You only want to score through the skin and some of the fat underneath.
Mix the kosher salt, garlic powder, thyme, black pepper, smoked paprika, and onion powder in a small bowl.
Rub the seasoning evenly over all sides of the duck legs.
If you have time, place the seasoned duck uncovered in the refrigerator for 4–12 hours. This extra step helps dry the skin and gives the seasoning more time to penetrate. If dinner is calling and you cannot wait, you can roast them immediately.
Step 2: Arrange the Duck for Roasting

Place the duck legs skin-side up on a wire rack inside a roasting pan.
Add the crushed garlic and rosemary around the duck rather than directly on top of the skin.
Pour ½ cup chicken stock or water into the bottom of the pan.
If you do not have a rack, place the duck directly in the roasting dish. Leave some space between each leg so hot air can circulate.
Important: Do not cover the duck with foil. Covered duck will steam instead of developing crisp skin.
Step 3: Slow Roast and Render the Fat

Place the roasting pan in the preheated oven and roast at 350°F for about 1 hour 30 minutes.
After about 45–60 minutes, carefully check the pan. You should see a noticeable amount of duck fat collecting underneath the legs.
If the pan becomes completely dry, add a small splash of water or stock. Be careful when opening the oven because hot steam can escape.
You can carefully spoon or pour excess rendered duck fat into a heatproof container during cooking if there is a very large amount.
Do not pour hot duck fat down the sink. It can solidify inside your plumbing.
The duck is ready for the final crisping stage when the meat is tender and the skin has rendered a good amount of fat.
Step 4: Crisp the Skin

Increase the oven temperature to 425°F (220°C).
Return the duck to the oven and roast for another 20–30 minutes, watching closely toward the end.
The skin should become deeply golden, crisp, and blistered in places.
If your oven has strong top heat, keep a close eye on the duck during the final 10 minutes. Duck skin contains a lot of fat and can go from beautifully browned to burnt surprisingly quickly.
For food safety, use an instant-read thermometer in the thickest part of the meat without touching the bone. Duck legs are best cooked well beyond the minimum safe temperature because the extra cooking time helps break down connective tissue and makes the meat much more tender.
Step 5: Make an Optional Quick Finishing Glaze

For a sweet-tangy finish, combine:
- 1 teaspoon honey
- 1 teaspoon Dijon mustard
- 1 teaspoon lemon juice
Brush a very thin layer over the crisp duck during the final 3–5 minutes of cooking.
Do not add the glaze too early. Honey can burn at high oven temperatures.
If you prefer classic crispy roasted duck, simply skip the glaze. The seasoned skin is delicious on its own.
Step 6: Rest and Serve
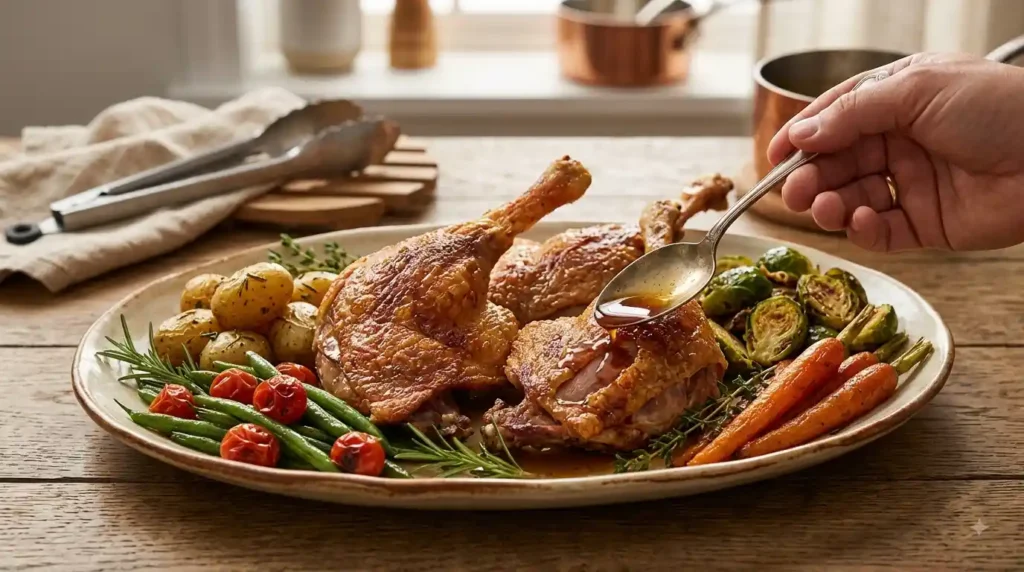
Remove the duck legs from the oven and let them rest for 10 minutes before serving.
Do not cover them tightly with foil during the rest. Trapped steam can soften that gorgeous crispy skin you worked for.
Serve the duck legs with roasted potatoes, mashed potatoes, green beans, Brussels sprouts, carrots, or a fresh green salad.
For an especially cozy dinner, spoon a little of the flavorful pan juice over the meat while keeping the crispy skin exposed.
Health Benefits
Duck legs are rich and satisfying, and they provide several useful nutrients.
- High-quality protein: Duck provides protein that supports muscle maintenance and helps make a meal filling.
- Iron: Duck contains iron, an important mineral involved in oxygen transport in the body.
- Vitamin B12: Duck is a source of vitamin B12, which supports normal red blood cell and nervous system function.
- Zinc: Zinc plays a role in immune function and normal metabolism.
- Protein-rich meal: Pairing the duck with vegetables creates a more balanced dinner with protein, fiber, vitamins, and minerals.
That said, duck legs are naturally high in fat, especially when the skin is eaten. If you are watching your calorie or saturated-fat intake, serve a smaller portion and pair the duck with plenty of vegetables.
Nutrition Information (Per Serving)
Approximate values based on one duck leg with skin and seasoning. Actual nutrition will vary depending on the size of the duck legs and how much rendered fat is consumed.
| Nutrient | Approximate Amount |
|---|---|
| Calories | 520 |
| Protein | 30 g |
| Fat | 42 g |
| Carbohydrates | 4 g |
| Fiber | 1 g |
| Sugar | 1 g |
| Sodium | 850 mg |
Tip: The nutrition can change considerably depending on how much duck fat remains on the finished portion and whether you add the optional honey glaze.
Pro Tips & Variations
For the crispiest duck skin
Dry the skin thoroughly. This is one of the biggest differences between soft and crispy duck skin.
For even better results, season the duck and refrigerate it uncovered overnight. The refrigerator’s dry air naturally helps remove surface moisture.
Do not skip the slow roast
It can be tempting to turn the oven up and cook the duck quickly, but duck legs benefit from slow cooking. The longer roasting time allows the fat to render while the connective tissue softens.
Save the duck fat
Strain the rendered duck fat into a clean heatproof container and refrigerate it once cooled.
Use it later for:
- Crispy roasted potatoes
- Roasted carrots
- Fried eggs
- Sautéed vegetables
- Savory breakfast potatoes
Duck fat can add incredible flavor to simple dishes, so don’t automatically throw it away.
Easy flavor variations
Orange & Herb Duck:
Add orange zest, rosemary, thyme, and a little orange juice to the finishing glaze.
Garlic Herb Duck:
Use extra thyme, rosemary, cracked black pepper, and roasted garlic.
Honey Mustard Duck:
Brush the cooked duck with honey, Dijon mustard, and lemon juice during the final few minutes.
Asian-Inspired Duck:
Finish with a mixture of soy sauce, honey, ginger, garlic, and a splash of rice vinegar. Use only a thin coating because the soy sauce can darken quickly at high heat.
Spicy Duck Legs:
Add cayenne pepper or chili flakes to the seasoning mix for gentle heat.
If the skin is not crispy enough
Do not panic. Move the duck to a higher rack and continue roasting at 425°F for a few more minutes.
You can also use the broiler briefly, but stay right beside the oven. The skin can burn very quickly under direct heat.
How Much Does It Cost to Make?
Prices vary by location and duck availability, but this recipe is reasonably affordable for a special dinner compared with ordering duck at a restaurant.
| Ingredient | Estimated Cost |
|---|---|
| 4 duck legs | $14–$20 |
| Seasonings | $1–$2 |
| Garlic & rosemary | $1–$2 |
| Chicken stock | $0.50–$1 |
| Optional glaze ingredients | $1–$2 |
| Estimated Total | $17.50–$27 |
| Approx. Cost Per Serving | $4.40–$6.75 |
Budget tip: Look for duck legs in the frozen section or buy them when specialty poultry is on sale. You can also freeze uncooked duck legs for later use if the packaging allows it.
Frequently Asked Questions
How do you get crispy skin on duck legs?
The biggest trick is to dry the duck skin thoroughly before roasting. Pat the legs dry with paper towels and, if possible, refrigerate them uncovered for several hours or overnight. Slow roasting helps render the fat, while finishing at 425°F gives the skin its final crisp texture.
What temperature should duck legs be cooked to?
For food safety, duck should reach at least 165°F (74°C) in the thickest part of the meat. However, duck legs are a tough, collagen-rich cut, so cooking them longer allows the connective tissue to soften and produces a more tender texture.
Can I make duck legs ahead of time?
Yes. Roast the duck until tender, then cool and refrigerate it. When ready to serve, place the legs skin-side up in a hot oven at 425°F until heated through and the skin is crisp again.
This method can actually make dinner easier because the slow-cooking portion is already done.
Can I use duck legs without a roasting rack?
Absolutely. A roasting rack helps circulate hot air and allows the rendered fat to drain away, but it is not essential. You can place the duck legs directly in an oven-safe roasting dish. Just leave space between them and turn or reposition them if necessary for even browning.
Final Thoughts
Crispy roasted duck legs may look like a restaurant-only dish, but they are surprisingly approachable at home. The process is mostly hands-off: season, roast slowly, crisp the skin, and rest.
The real reward is that combination of crackly golden skin and tender, richly flavored meat. Once you learn how easy duck legs can be, they are a fantastic option for a cozy Sunday dinner, holiday meal, or special weeknight when you want something a little different.
Take your time, keep the skin dry, and let the oven do the hard work. Your kitchen is about to smell amazing.