

There’s something deeply satisfying about making spring rolls at home. The moment that first roll hits hot oil and starts to sizzle, the kitchen smells like your favorite takeout spot. If you’re craving something savory, crispy, and packed with juicy pork and crunchy vegetables, this recipe is a great excuse to get cooking.
These pork spring rolls are crisp on the outside, flavorful in the middle, and surprisingly simple once you get the rolling technique down. The secret to that shatteringly crisp wrapper is a well-drained filling, properly sealed rolls, and oil at the right temperature. Make a batch for a family dinner, party appetizer, or freezer stash, and serve them hot with sweet chili sauce.
Prep & Cook Time
| Time | Details |
|---|---|
| Prep Time | 25 minutes |
| Cook Time | 15 minutes |
| Total Time | 40 minutes |
| Servings | 12 spring rolls |
Yield: 12 crispy pork spring rolls.
What Equipment Do You Need?
You only need a few basic kitchen tools:
- Large skillet or wok
- Wooden spoon or spatula
- Sharp chef’s knife
- Cutting board
- Mixing bowl
- Small bowl for sealing wrappers
- Tongs
- Deep, heavy-bottomed saucepan or deep fryer
- Instant-read kitchen thermometer
- Wire rack
- Baking sheet
- Paper towels
Chef’s note: A wire rack is better than piling freshly fried spring rolls directly on paper towels. Air can circulate underneath, helping the wrappers stay crisp.
Ingredients
For the Pork Filling
- 1 tablespoon neutral oil, such as vegetable or canola oil
- 1 pound ground pork
- 2 cloves garlic, finely minced
- 1 teaspoon fresh ginger, finely grated
- 2 cups finely shredded green cabbage
- 1 medium carrot, julienned or grated
- 2 green onions, thinly sliced
- 2 tablespoons low-sodium soy sauce
- 1 tablespoon oyster sauce
- 1 teaspoon toasted sesame oil
- ½ teaspoon ground white pepper
- ¼ teaspoon salt, or to taste
For Rolling
- 12 spring roll wrappers, thawed according to package directions
- 1 tablespoon all-purpose flour
- 2 tablespoons water
For Frying
- 6–8 cups neutral frying oil, enough to give the rolls plenty of room to cook
For Serving
- Sweet chili sauce
- Soy sauce
- Optional: rice vinegar or a squeeze of fresh lime
Important: Spring roll wrappers can dry out quickly once opened. Keep unused wrappers covered with a slightly damp, clean kitchen towel while you work.
Why Each Ingredient Matters
Ground pork: Pork brings rich, savory flavor and enough natural fat to keep the filling juicy without making it greasy when properly drained.
Cabbage: Cabbage gives the filling its classic crunch and mild sweetness. Finely shredding it helps it cook quickly and makes the rolls easier to wrap.
Carrot: Carrot adds color, subtle sweetness, and a pleasant bite.
Garlic and ginger: These two aromatics create the savory backbone of the filling. Fresh ginger also adds a gentle warmth that keeps the pork from tasting heavy.
Soy sauce: Soy sauce provides salt and umami. Using low-sodium soy sauce gives you more control over the final seasoning.
Oyster sauce: A small amount adds deep, slightly sweet umami flavor. It makes the filling taste much more rounded.
Sesame oil: This is a finishing ingredient rather than a cooking oil. A teaspoon is enough to add a fragrant toasted-sesame note.
Spring roll wrappers: Thin wrappers are responsible for that delicate, blistered crunch. Keep them covered so they don’t become brittle while you’re rolling.
Flour paste: Flour mixed with water creates a simple edible glue that seals the wrapper securely.
Step-by-Step Instructions
Step 1: Prepare the Filling
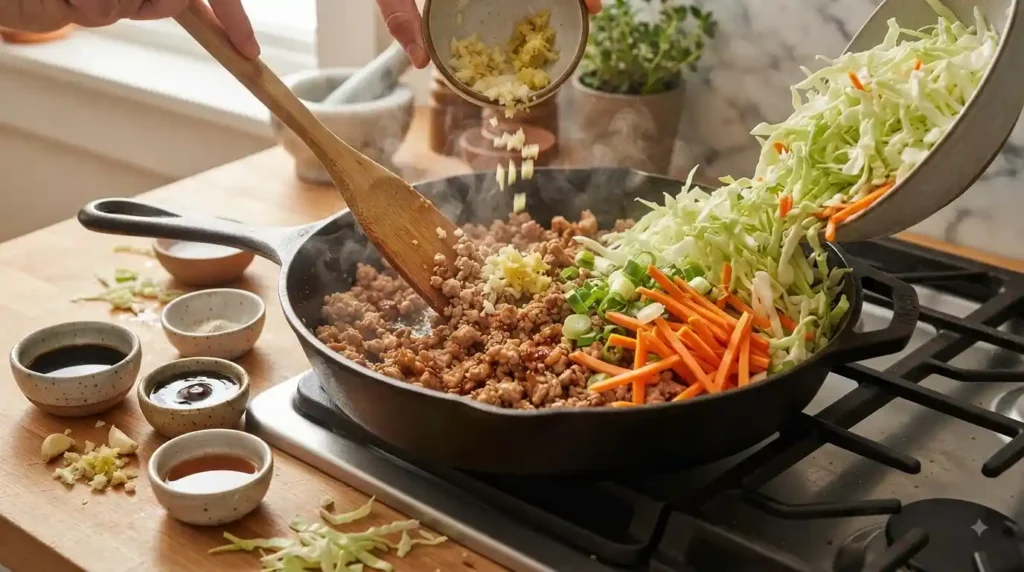
Heat 1 tablespoon of neutral oil in a large skillet or wok over medium-high heat.
Add the ground pork and cook for about 4–5 minutes, breaking it apart with a wooden spoon. Continue cooking until the pork is fully cooked and no longer pink.
Add the minced garlic and grated ginger. Stir-fry for about 30 seconds, just until fragrant.
Add the shredded cabbage and carrot. Cook for another 2–3 minutes. You want the vegetables slightly softened but not completely limp.
Stir in the soy sauce, oyster sauce, sesame oil, white pepper, and salt.
Cook for another minute, then remove the filling from the heat.
The crucial part: Transfer the filling to a bowl and let it cool completely. If it is hot or watery when you roll the spring rolls, the wrappers can become soggy or tear.
Step 2: Drain and Cool the Filling
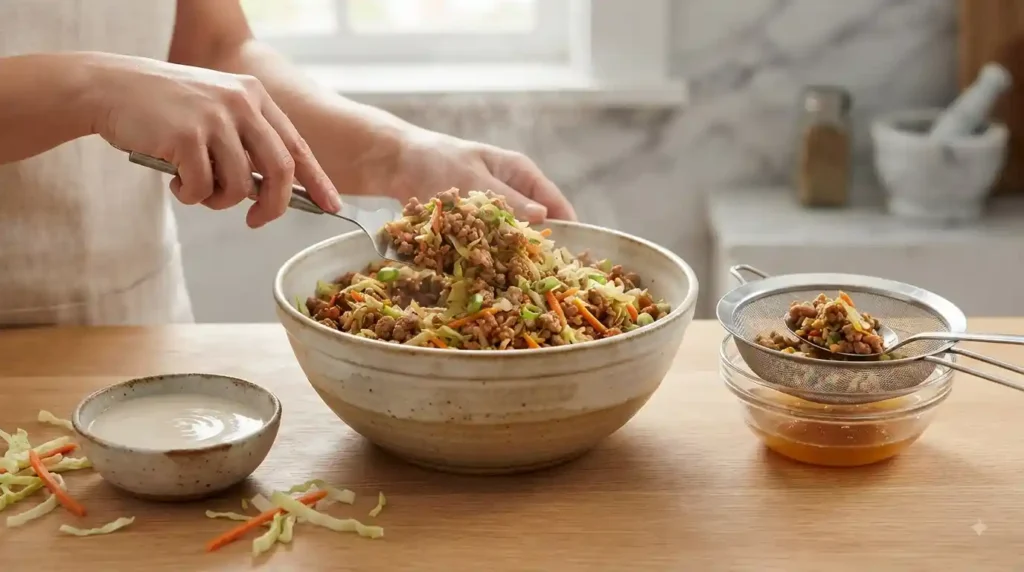
Once the filling is cool enough to handle, check for excess liquid.
If you see liquid collecting at the bottom of the bowl, drain it. You can also gently press the filling against the side of a fine-mesh strainer.
This step may seem small, but it makes a huge difference. Moisture is the enemy of crispy spring rolls.
Meanwhile, mix 1 tablespoon flour with 2 tablespoons water in a small bowl until smooth. This will be your sealing paste.
Step 3: Fill the Wrappers
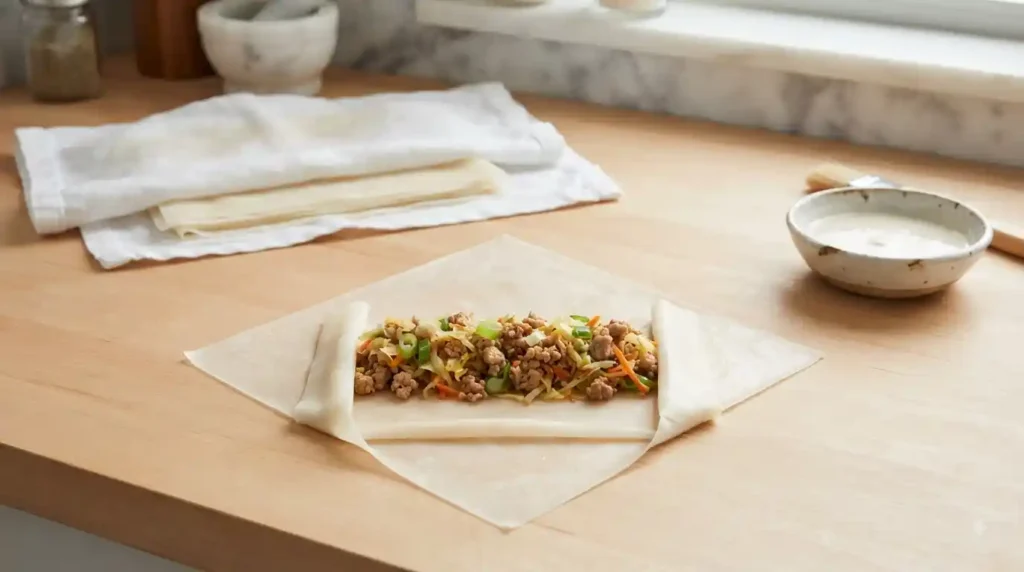
Place one spring roll wrapper on a clean, dry work surface with one corner pointing toward you, creating a diamond shape.
Place about 2 tablespoons of filling slightly below the center of the wrapper.
Don’t overfill. It can be tempting to add another spoonful, but an overloaded spring roll is much harder to seal and more likely to burst in the oil.
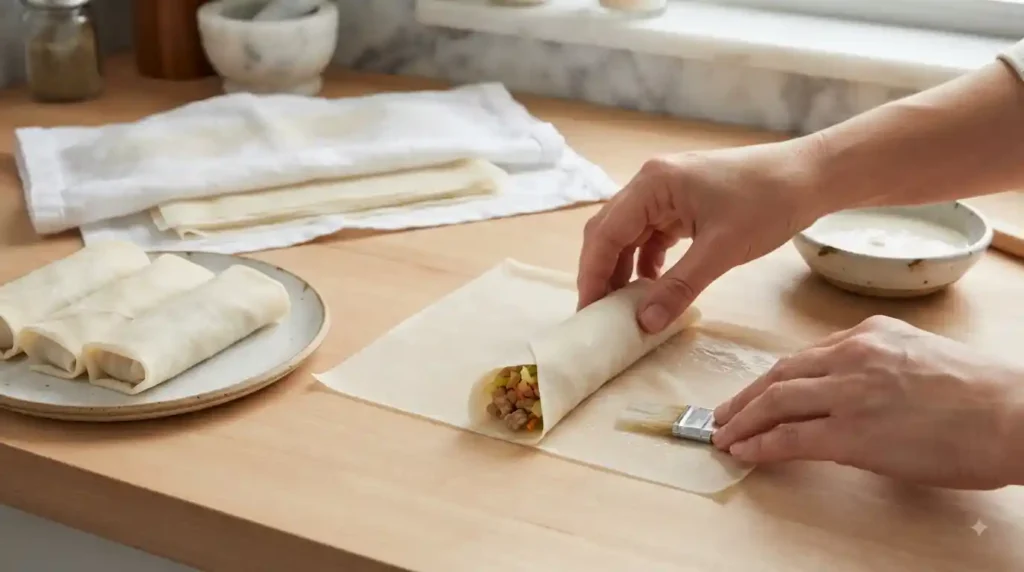
Fold the bottom corner over the filling. Fold the left and right corners toward the center, then roll the spring roll upward tightly.
Brush a small amount of flour paste over the top corner and finish rolling.
Place the finished roll seam-side down on a plate or baking sheet.
Repeat with the remaining wrappers and filling.
Step 4: Heat the Oil
Pour the frying oil into a deep, heavy-bottomed saucepan or deep fryer.
Heat the oil to 350°F (175°C).
Use an instant-read thermometer if possible. Oil temperature is one of the biggest factors in getting crisp spring rolls.
- If the oil is too cool, the wrappers absorb oil and become greasy.
- If the oil is too hot, the outside can brown before the filling heats through.
Keep the oil level safely below the top of your pan, and never leave hot oil unattended.
Step 5: Fry Until Golden and Crisp
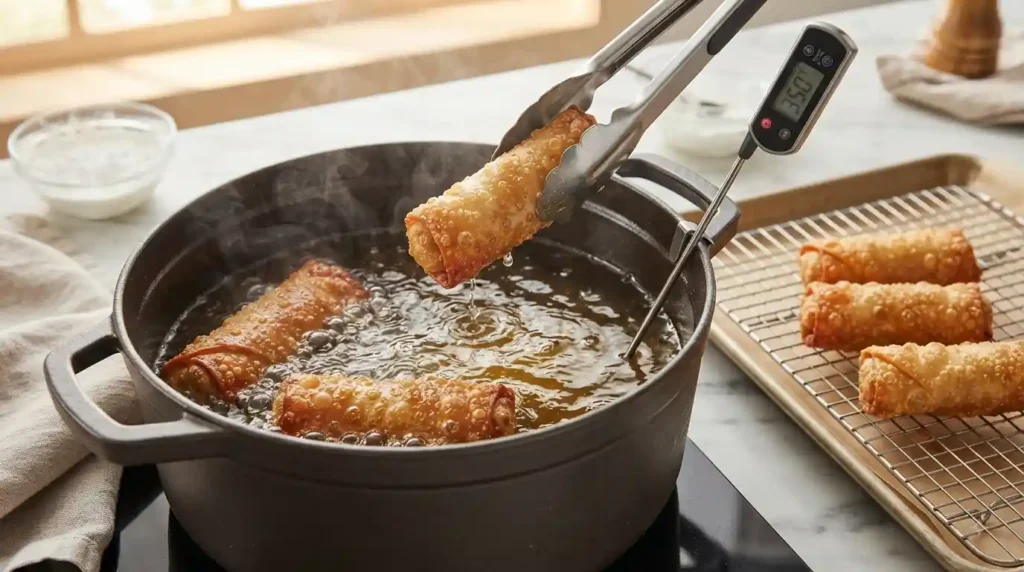
Carefully lower 2–3 spring rolls into the hot oil. Avoid overcrowding the pan because adding too many at once can dramatically lower the oil temperature.
Fry for approximately 3–4 minutes, turning occasionally with tongs, until the wrappers are deeply golden and crisp.
Keep an eye on them toward the end. Spring roll wrappers can go from golden to overly dark surprisingly quickly.
Transfer the cooked spring rolls to a wire rack set over a baking sheet.
Repeat with the remaining spring rolls, allowing the oil to return to about 350°F between batches.
Step 6: Rest Briefly and Serve
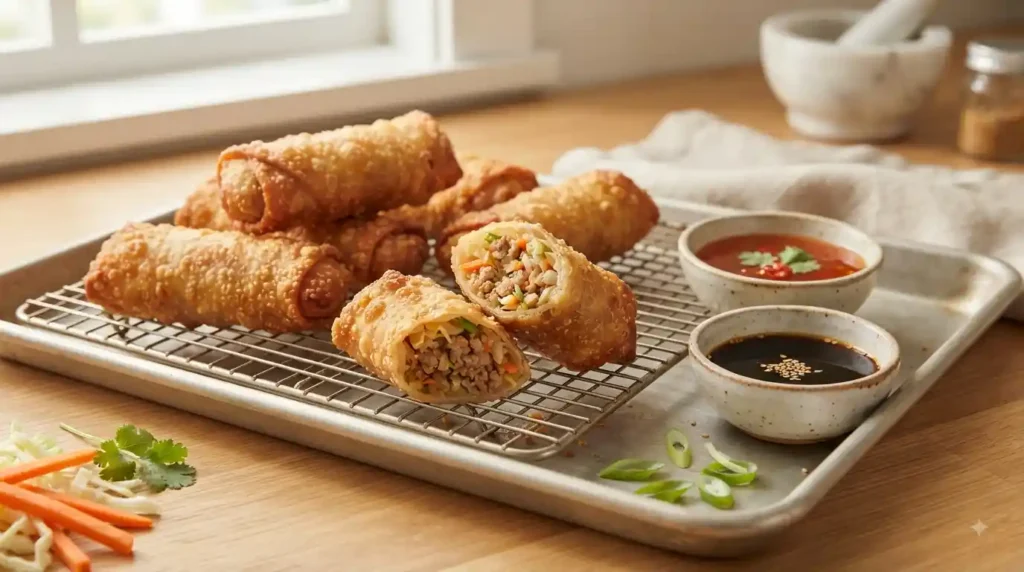
Let the spring rolls rest on the wire rack for 2–3 minutes before serving.
Serve them warm with sweet chili sauce, soy sauce, or your favorite dipping sauce.
For the best texture, eat them soon after frying. That delicate crackle is at its peak while they’re fresh.
Food safety reminder: Ground pork should be cooked thoroughly. If you’re checking the filling temperature directly, it should reach 160°F (71°C).
Health Benefits
These spring rolls are an indulgent crispy food, but the filling still provides several useful nutrients.
- Pork provides protein, which supports muscle maintenance and helps make the meal satisfying.
- Cabbage contributes vitamin C, vitamin K, and fiber.
- Carrots provide beta-carotene, which the body can convert to vitamin A.
- Garlic and ginger contribute flavorful plant compounds while allowing you to build a lot of flavor without relying on excessive salt.
- Adding vegetables increases the volume and texture of the filling without dramatically increasing calories.
Because these are deep-fried, portion size and cooking method still matter. For a lighter option, see the air-fryer variation below.
Nutrition Information (Per Serving)
Approximate nutrition for 1 pork spring roll, excluding dipping sauce:
| Nutrient | Amount |
|---|---|
| Calories | 155 kcal |
| Protein | 7 g |
| Fat | 8 g |
| Carbs | 14 g |
Nutrition is an estimate and can vary depending on the brand of wrappers, amount of oil absorbed during frying, and exact ingredient quantities.
Pro Tips & Variations
For Extra-Crispy Spring Rolls
1. Keep the filling dry.
This is probably the most important tip. Cook off excess moisture before rolling.
2. Cool the filling completely.
Warm filling creates steam inside the wrapper and can make the rolls soggy or difficult to seal.
3. Don’t overcrowd the fryer.
Frying in small batches keeps the oil temperature stable.
4. Use a thermometer.
Guessing the oil temperature is one of the easiest ways to end up with greasy spring rolls.
5. Roll firmly, but don’t crush the wrapper.
You want a snug roll with no large air pockets, but excessive pressure can tear thin wrappers.
6. Serve them quickly.
Freshly fried spring rolls have their best texture immediately after cooking.
Easy Variations
Pork and Shrimp Spring Rolls:
Replace half of the ground pork with finely chopped raw shrimp for a seafood-forward version.
Spicy Pork Spring Rolls:
Add ½–1 teaspoon chili flakes or a teaspoon of chili garlic sauce to the filling.
Mushroom Pork Spring Rolls:
Add ½ cup finely chopped shiitake mushrooms. Cook them thoroughly so excess moisture evaporates before rolling.
Vegetarian Spring Rolls:
Replace the pork with finely chopped mushrooms, cabbage, carrots, bean sprouts, and additional tofu or edamame for protein. Use vegetarian oyster sauce if desired.
Air-Fryer Spring Rolls:
Lightly brush or spray the assembled spring rolls with oil. Air fry at approximately 400°F (200°C) for about 8–12 minutes, turning halfway through, until crisp and golden. Exact cooking time varies by air fryer.
Oven-Baked Spring Rolls:
Brush lightly with oil and bake at 425°F (220°C) until crisp and golden, turning once during cooking. They won’t have exactly the same blistered texture as deep-fried rolls, but they’re a convenient lighter option.
How Much Does It Cost to Make?
Prices vary by location and grocery store, but this recipe is fairly budget-friendly for a homemade appetizer.
| Ingredient | Estimated Cost |
|---|---|
| Ground pork | $4.50 |
| Cabbage | $1.00 |
| Carrot | $0.50 |
| Garlic, ginger & green onions | $1.50 |
| Soy & oyster sauce | $1.00 |
| Spring roll wrappers | $3.00 |
| Frying oil | $1.50 |
| Flour & seasonings | $0.50 |
| Estimated Total | $13.50 |
That works out to roughly $1.13 per spring roll for a 12-roll batch, although the actual cost will depend on local grocery prices and how much of the oil and condiments you already have.
If your pantry already has soy sauce, oyster sauce, oil, flour, garlic, and seasonings, the out-of-pocket cost can be considerably lower.
Frequently Asked Questions
What is the secret to crispy spring rolls?
The biggest secrets are dry filling, properly sealed wrappers, and oil heated to around 350°F (175°C). Don’t overcrowd the pan, and drain the finished spring rolls on a wire rack rather than stacking them.
Why are my pork spring rolls soggy?
Usually, excess moisture is the culprit. Vegetables release water as they cook, and hot filling also creates steam. Cook the vegetables until excess moisture has evaporated, drain the filling well, and cool it completely before wrapping.
Can I make pork spring rolls ahead of time?
Yes. Assemble the spring rolls and keep them covered in the refrigerator for a short period before frying. For longer storage, freeze uncooked spring rolls in a single layer, then transfer them to a freezer-safe container once solid. They can generally be fried from frozen, but allow extra cooking time and take care around oil splatter.
Can I freeze homemade pork spring rolls?
Absolutely. Place uncooked spring rolls in a single layer on a parchment-lined baking sheet and freeze until firm. Then transfer them to a freezer bag or airtight container. Separating layers with parchment helps prevent sticking. For food safety and best quality, keep the freezer consistently at 0°F (-18°C).
Final Thoughts
Homemade pork spring rolls are one of those recipes that feels a little more impressive than it actually is. Once you get comfortable with the folding technique, the process becomes easy—and the payoff is a plate of golden, crunchy rolls that disappear remarkably fast.
Take your time with the filling, keep moisture under control, and don’t rush the oil temperature. Get those three things right, and you’ll be well on your way to wonderfully crisp spring rolls every time.