

French toast is one of those breakfasts that can turn an ordinary morning into something special. There’s something deeply satisfying about waking up to the smell of warm bread, butter, and vanilla in the kitchen. But if you’ve ever made French toast only to watch your slices fall apart or turn disappointingly thin, the bread may be the real problem. A sturdy, fluffy loaf makes all the difference.
This homemade French toast bread is designed to give you thick slices with a soft, tender crumb and enough structure to soak up custard without collapsing. It’s lightly sweet, buttery, and delicious fresh from the oven, but it becomes even better for French toast after resting overnight. And yes, your kitchen may get a little floury—that’s part of the fun.
Prep & Cook Time
| Time | Details |
|---|---|
| Prep Time | 20 minutes |
| First Rise | 1 hour 15 minutes |
| Second Rise | 35–45 minutes |
| Bake Time | 30–35 minutes |
| Total Time | About 2 hours 45 minutes |
| Servings | 10–12 thick slices |
Yield: 1 standard 9 × 5-inch loaf
What Equipment Do You Need?
You don’t need fancy baking equipment for this recipe. A few basic kitchen tools are enough:
- Large mixing bowl
- Small microwave-safe bowl or saucepan
- Wooden spoon or sturdy spatula
- 9 × 5-inch loaf pan
- Kitchen scale or measuring cups
- Measuring spoons
- Clean kitchen towel
- Wire cooling rack
- Pastry brush, optional, for brushing the loaf with butter
- Sharp serrated bread knife
A stand mixer with a dough hook can make kneading easier, but it isn’t required.
Ingredients
- 3 cups (375 g) all-purpose flour, plus a little extra if needed
- 2 ¼ teaspoons (7 g) instant yeast
- ¼ cup (50 g) granulated sugar
- 1 teaspoon fine salt
- ¾ cup (180 ml) whole milk, lukewarm
- 1 large egg, room temperature
- 4 tablespoons (56 g) unsalted butter, softened
- 1 teaspoon vanilla extract
- 1 tablespoon melted butter, for brushing the baked loaf, optional
Optional for an Extra-Tender Loaf
- 1 tablespoon powdered milk for a slightly softer crumb
- 1 tablespoon honey in place of 1 tablespoon of the sugar for added moisture and browning
Why Each Ingredient Matters
All-purpose flour:
Provides the gluten structure needed to create a loaf that can hold its shape while still staying soft. Bread flour can also work, but it may produce a slightly chewier loaf.
Instant yeast:
Creates carbon dioxide during fermentation, which gives the bread its light, fluffy texture. Instant yeast can be mixed directly into the flour without proofing first.
Whole milk:
Adds moisture, richness, and a tender crumb. The milk’s natural sugars also help the crust brown beautifully.
Egg:
Adds richness and structure while helping create a soft, slightly golden interior.
Butter:
Fat tenderizes the dough and gives the bread that rich, bakery-style flavor that works especially well with French toast.
Sugar:
Adds gentle sweetness and helps the crust develop a lovely golden color. It also balances the savory notes from the flour and butter.
Salt:
A small amount makes a huge difference. It sharpens the flavor and prevents the loaf from tasting flat.
Vanilla:
Adds a subtle dessert-like aroma that pairs beautifully with cinnamon, maple syrup, berries, and powdered sugar when the bread is later turned into French toast.
Step-by-Step Instructions
Step 1: Warm the Milk and Prepare the Dough
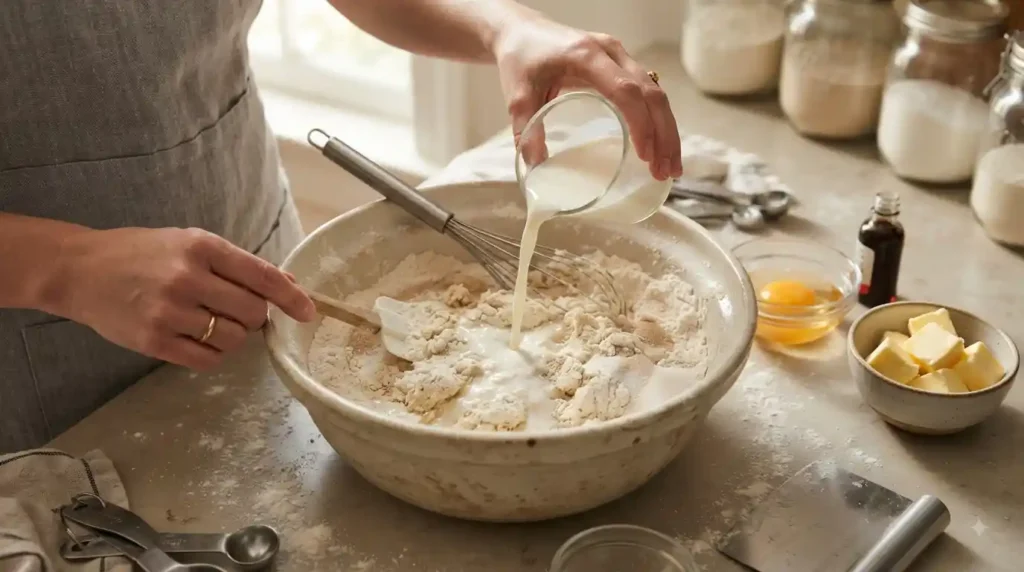
Warm the ¾ cup milk until it feels comfortably warm, not hot. Aim for roughly 100–110°F (38–43°C).
In a large mixing bowl, combine:
- 3 cups flour
- 2 ¼ teaspoons instant yeast
- ¼ cup sugar
- 1 teaspoon salt
Add the warm milk, egg, and vanilla. Stir until a rough, shaggy dough forms.
Add the softened butter and continue mixing until the butter is mostly incorporated.
Don’t panic if the dough looks messy at this point. That’s completely normal.
Step 2: Knead Until Smooth and Elastic
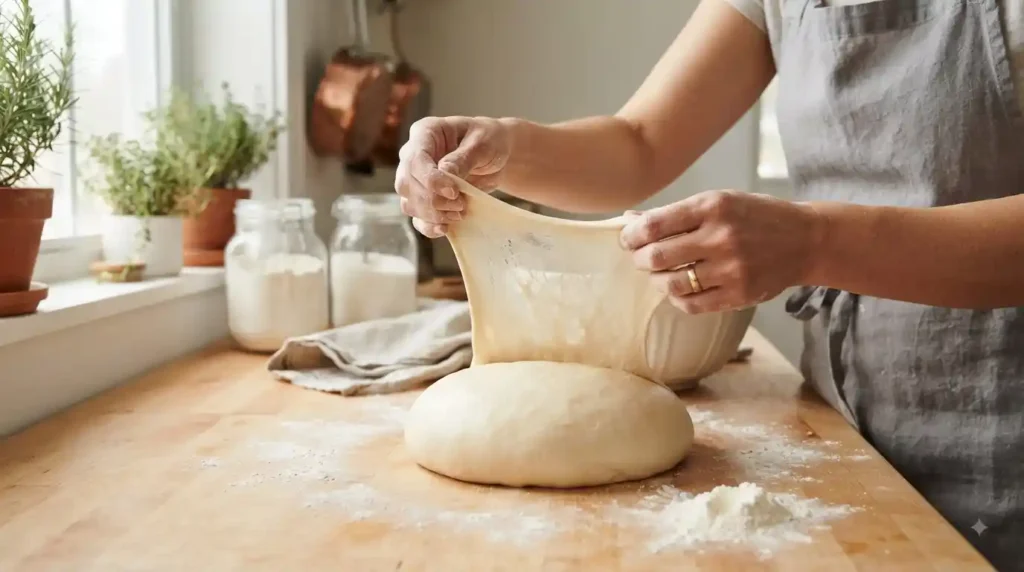
Transfer the dough to a lightly floured surface and knead for approximately 8–10 minutes.
If using a stand mixer, knead with the dough hook on low to medium-low speed for about 6–8 minutes.
The finished dough should feel:
- Soft
- Smooth
- Slightly tacky
- Elastic
- Not excessively sticky
Avoid adding lots of extra flour. Too much flour is one of the easiest ways to end up with dense bread.
A useful test is the windowpane test: gently stretch a small piece of dough. If it can stretch thin enough to let light through without immediately tearing, the gluten has developed well.
Step 3: Let the Dough Rise
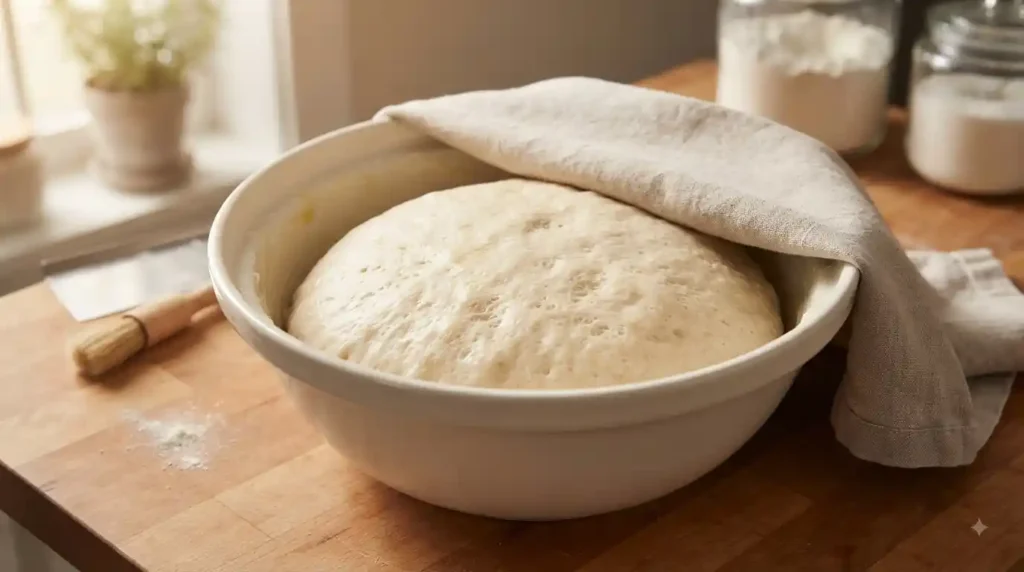
Place the dough in a lightly greased bowl and turn it once so the surface is lightly coated.
Cover with a clean kitchen towel or plastic wrap.
Let it rise in a warm, draft-free spot for about 1 to 1¼ hours, or until roughly doubled in size.
The exact timing depends on your kitchen temperature. On a chilly day, it may take longer.
Don’t rely only on the clock. Look at the dough. When it has visibly expanded and feels airy, you’re ready for the next step.
Step 4: Shape the Loaf
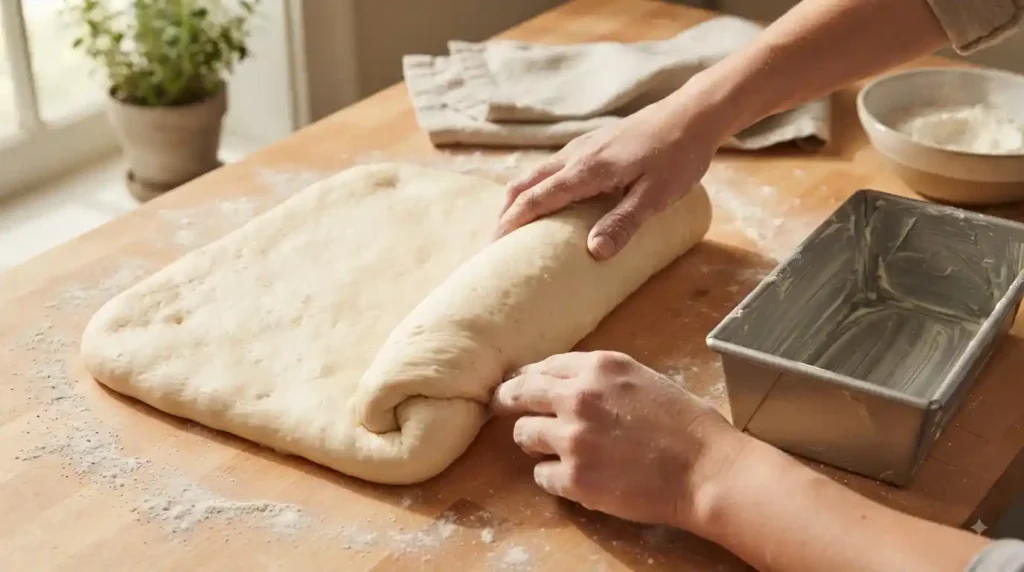
Gently press down the risen dough to release excess gas.
Place it on a lightly floured surface and shape it into a rectangle roughly the length of your loaf pan.
Roll the dough tightly into a log, pinching the seam closed.
Place it seam-side down into a greased 9 × 5-inch loaf pan.
Try to keep the roll fairly even so the finished bread rises evenly instead of developing one very tall side.
Step 5: Let It Rise Again
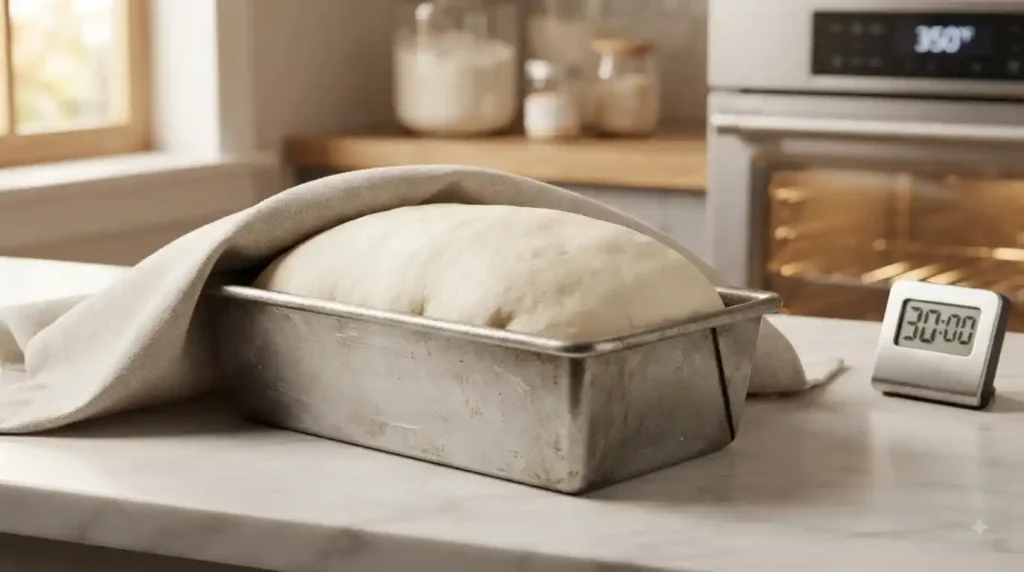
Cover the loaf loosely and let it rise for 35–45 minutes, or until the dough has risen noticeably above the rim of the pan.
Meanwhile, preheat your oven to 350°F (175°C).
Don’t let the dough overproof. If it becomes extremely puffy and starts looking fragile or sunken, it may struggle to hold its shape in the oven.
Step 6: Bake, Cool, and Slice Thick
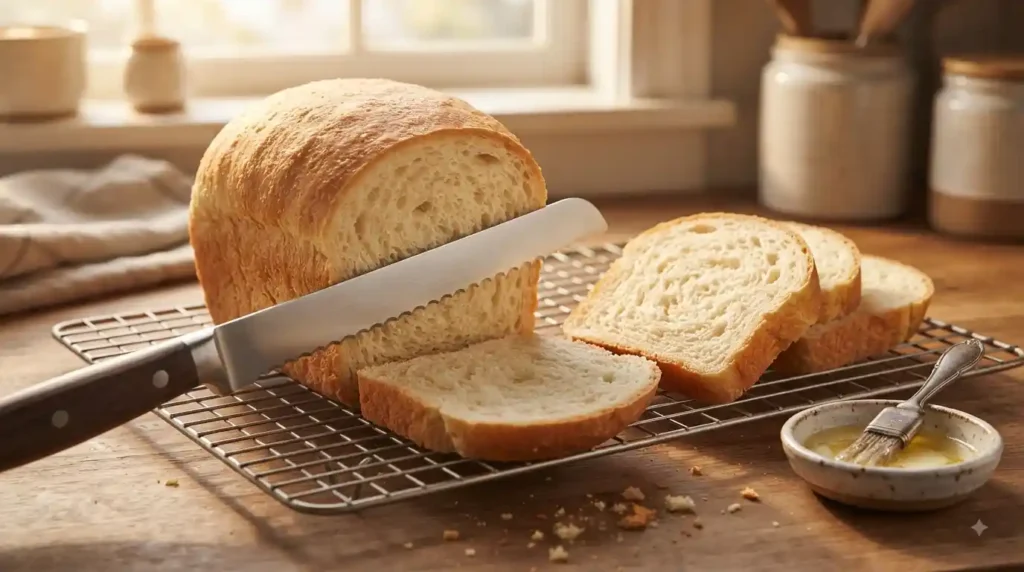
Bake the loaf at 350°F (175°C) for approximately 30–35 minutes, until the top is deeply golden and the internal temperature reaches around 190–200°F (88–93°C).
If the top starts browning too quickly, loosely cover it with foil during the final part of baking.
Remove the loaf from the pan and, if desired, brush the top with 1 tablespoon melted butter.
Let it cool completely on a wire rack before slicing.
For the best French toast, allow the bread to cool completely and preferably let it sit overnight before slicing into ¾- to 1-inch-thick pieces.
Food safety note: Never cut into very hot bread with your hand close to the blade. Steam can escape unexpectedly, and the loaf can be surprisingly hot inside.
Health Benefits
This homemade bread isn’t a low-calorie food, but making it yourself gives you control over the ingredients and portion size.
Potential nutritional advantages include:
- Eggs and milk provide protein, which helps make breakfast more satisfying.
- Whole milk contributes calcium and other essential nutrients.
- Homemade bread lets you control the amount of sugar and salt.
- There are no unnecessary preservatives typically found in some packaged breads.
- Pairing a slice with fresh berries, Greek yogurt, or nut butter can make a more balanced breakfast.
For a higher-fiber version, replace up to 1 cup of the all-purpose flour with whole-wheat flour. Keep in mind that the loaf may be slightly denser.
Nutrition Information (Per Serving)
Approximate nutrition based on 12 slices per loaf, before adding toppings or turning the bread into French toast.
| Nutrient | Approximate Amount |
|---|---|
| Calories | 180 kcal |
| Protein | 5 g |
| Fat | 5 g |
| Carbohydrates | 29 g |
Nutrition will vary depending on the exact flour, milk, butter, and slice size used.
Pro Tips & Variations
For Extra-Thick French Toast
Slice the cooled bread ¾ to 1 inch thick. Thin slices won’t give you the soft, custardy center this bread is designed for.
Use Day-Old Bread
Fresh bread is delicious, but slightly stale bread is actually better for French toast. It absorbs the egg mixture without becoming instantly soggy.
For the best texture, bake the loaf the day before and leave it loosely covered overnight.
Don’t Add Too Much Flour
The dough should be slightly tacky rather than dry. If you keep adding flour because your hands feel a little sticky, the finished loaf can become heavy.
Lightly oiling your hands is often better than adding another handful of flour.
Make It Brioche-Style
For a richer loaf, increase the butter to 6 tablespoons and add an extra egg yolk. The result will be more luxurious and especially good for weekend French toast.
Add Cinnamon
For a warm breakfast flavor, add 1 teaspoon ground cinnamon to the dry ingredients.
Make It Honey-Sweetened
Replace part of the granulated sugar with 1 tablespoon honey. This adds moisture and a slightly deeper flavor.
For a Softer Crust
Brush the freshly baked loaf with melted butter and allow it to cool under a clean kitchen towel. This helps keep the crust softer.
How to Store It
Keep the cooled loaf in an airtight container or tightly wrapped at room temperature for up to 3 days.
For longer storage, slice it and freeze the slices in a freezer-safe bag for up to 2–3 months.
You can toast frozen slices directly when needed.
How Much Does It Cost to Make?
The exact cost depends on where you shop and the brands you use, but this loaf is generally inexpensive compared with bakery-style enriched bread.
| Ingredient | Estimated Cost |
|---|---|
| Flour | $0.45 |
| Milk | $0.35 |
| Egg | $0.30 |
| Butter | $0.65 |
| Yeast | $0.35 |
| Sugar | $0.10 |
| Vanilla & salt | $0.20 |
| Estimated Total | $2.40 |
That works out to roughly $0.20–$0.25 per slice when cut into 10–12 slices.
The cost can be even lower when buying flour, butter, and yeast in larger packages.
Frequently Asked Questions
What bread is best for French toast?
A thick, sturdy bread with a soft interior is ideal. Brioche, challah, milk bread, and homemade enriched white bread all work beautifully. This recipe is designed specifically to provide that balance of softness and structure.
Is it better to use stale bread for French toast?
Yes. Slightly stale bread absorbs the custard more effectively without falling apart. If your bread is fresh, slice it and leave it uncovered for several hours, or lightly dry the slices in a low oven before making French toast.
Why does my homemade bread come out dense?
Dense bread usually comes from one of a few problems: too much flour, insufficient kneading, inactive yeast, or under-proofing. Give the dough enough time to become noticeably puffy, and avoid measuring flour by packing it tightly into the cup.
Can I make this French toast bread ahead of time?
Absolutely. In fact, making it a day ahead is ideal. Let the loaf cool completely, wrap it well, and leave it at room temperature overnight. The slightly firmer texture makes it much easier to slice thickly and soak with French toast custard.
Final Thoughts
Once you make this loaf yourself, you’ll understand why the bread can make or break French toast. The soft crumb, sturdy structure, buttery flavor, and thick slices give you a much better starting point than thin sandwich bread.
Take your time with the dough, don’t drown it in extra flour, and let it cool before slicing. Then grab your favorite skillet, some butter, maple syrup, and fresh berries. A simple homemade loaf can turn a regular breakfast into the kind of meal everyone remembers.