

There’s something special about cooking duck at home. That rich, savory aroma, the sound of the skin slowly sizzling in the pan, and the moment you slice through the crisp skin to reveal juicy meat can make an ordinary dinner feel like a restaurant meal. If you’ve been craving a beautifully cooked duck breast but assumed it was too complicated, this recipe is here to change your mind.
This pan-seared duck breast recipe keeps things simple: a cold pan, patient rendering, and a quick finish on the meat side. You don’t need fancy equipment or complicated ingredients. The key is giving the duck fat enough time to render slowly so the skin becomes deeply golden and crisp without burning. Once you get that rhythm right, duck becomes surprisingly easy to cook in a home kitchen.
Prep & Cook Time
| Time & Serving | Details |
|---|---|
| Prep Time | 10 minutes |
| Cook Time | 20–25 minutes |
| Resting Time | 5 minutes |
| Total Time | 35–40 minutes |
| Servings | 4 |
Recipe yield: 4 servings, using 2 large boneless, skin-on duck breasts.
What Equipment Do You Need?
You only need a few basic kitchen tools:
- Large heavy-bottomed skillet, preferably cast iron or stainless steel
- Sharp chef’s knife
- Cutting board
- Tongs
- Paper towels
- Meat thermometer
- Small spoon or heatproof container for collecting rendered duck fat
- Instant-read thermometer, if available
A heavy skillet is especially useful because it holds heat well and helps the duck brown evenly.
Ingredients
- 2 large boneless, skin-on duck breasts, about 8 ounces each
- 1 teaspoon kosher salt, plus more to taste
- ½ teaspoon freshly ground black pepper
- 2 garlic cloves, lightly crushed
- 2 sprigs fresh thyme
- 1 small sprig fresh rosemary
- 1 teaspoon honey, optional, for a light glaze
- 1 teaspoon balsamic vinegar, optional
- 1 tablespoon unsalted butter, optional for finishing
For serving:
- Roasted vegetables, mashed potatoes, green beans, salad, or crusty bread
You do not need cooking oil for the initial sear. Duck breast releases plenty of its own fat as the skin renders.
Why Each Ingredient Matters
Duck breast:
Duck is naturally rich and flavorful, with a thick layer of fat beneath the skin. That fat slowly renders during cooking, helping create the crisp exterior that makes this dish special.
Kosher salt:
Salt seasons the meat and helps draw a small amount of moisture from the skin, which supports better browning.
Black pepper:
Adds gentle heat and balances the richness of the duck without overpowering its natural flavor.
Garlic:
Crushed garlic adds savory depth. Keeping it lightly crushed instead of finely chopped helps prevent it from burning during the long skin-side sear.
Thyme and rosemary:
These herbs bring an earthy, aromatic note that works beautifully with rich duck meat.
Honey:
A tiny amount can add sweetness and encourage a glossy finish. Use it sparingly because it can burn quickly in a hot pan.
Balsamic vinegar:
Its acidity cuts through the richness of the duck and adds a subtle sweet-tart contrast.
Butter:
Optional, but useful for creating a silky pan sauce during the final minute of cooking.
Step-by-Step Instructions
Step 1: Prepare and Score the Duck Skin
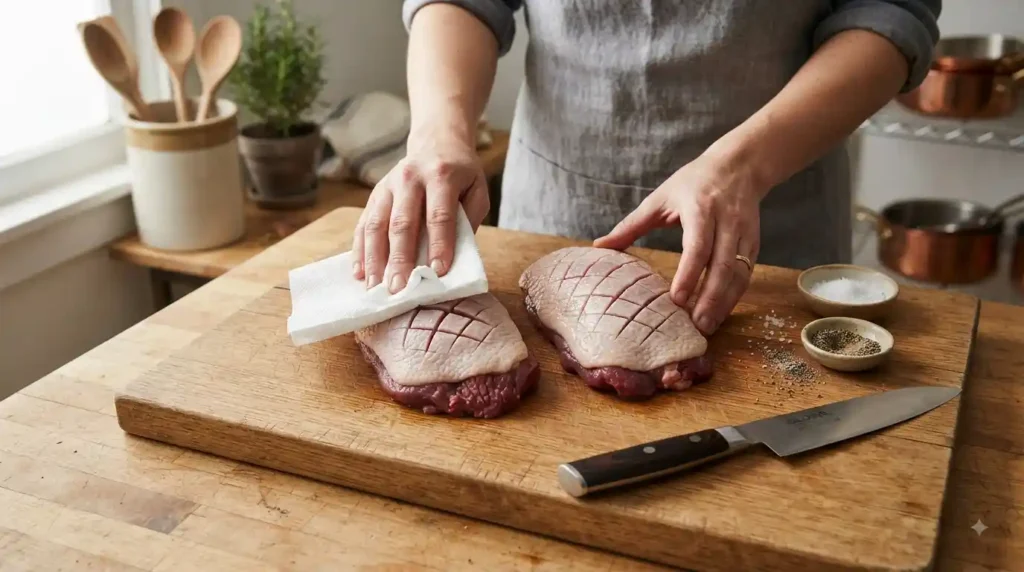
Take the duck breasts out of the refrigerator about 15–20 minutes before cooking.
Pat them very dry with paper towels. Moisture is one of the biggest enemies of crisp skin.
Using a sharp knife, score the skin in a shallow crosshatch pattern. Make cuts about ½ inch apart, cutting through the skin and fat but not into the meat.
Season both sides generously with kosher salt and black pepper.
Chef’s tip: Don’t skip drying the skin. A dry surface browns much more effectively than a damp one.
Step 2: Start in a Cold Skillet
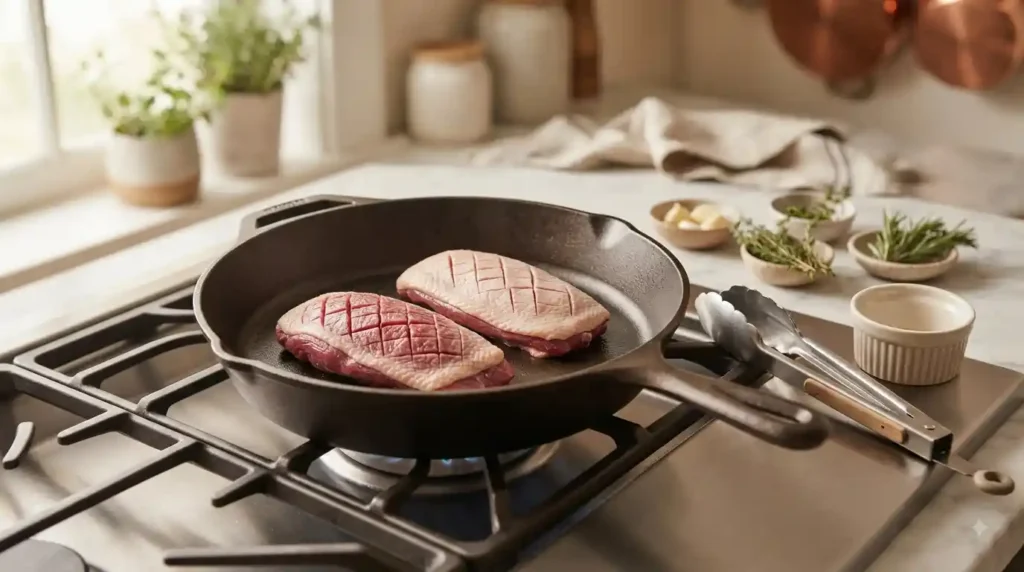
Place the duck breasts skin-side down in a cold, dry skillet.
Turn the heat to medium-low.
Let the duck cook slowly for about 10–15 minutes, depending on the thickness of the breasts. You should hear a gentle, steady sizzle rather than an aggressive frying sound.
As the fat melts, carefully spoon or pour off excess duck fat into a heatproof container.
Do not throw that fat away. Strain it and refrigerate it for roasting potatoes or vegetables.
Important: Never pour hot duck fat down the sink because it can harden and clog your pipes.
Step 3: Crisp the Skin

Continue cooking until the skin is deep golden brown and noticeably crisp.
If the skin is browning too quickly while the fat is still thick, reduce the heat. The goal is slow rendering, not rushing.
Once the skin is beautifully crisp, remove most of the excess rendered fat from the skillet, leaving about 1 teaspoon behind.
Turn the duck breasts over.
Step 4: Sear the Meat Side

Increase the heat to medium and cook the meat side for about 3–5 minutes.
Add the crushed garlic, thyme, and rosemary during the final couple of minutes.
Tilt the pan slightly and spoon some of the flavorful fat over the duck.
If using butter, add it near the end and baste the breasts with the foaming butter.
For food safety, use an instant-read thermometer to check the thickest part of the meat. Duck can be served at different levels of doneness depending on preference and local food-safety guidance; for the safest approach, cook poultry to 165°F (74°C).
Step 5: Add an Optional Quick Glaze

If you want a slightly sweet, restaurant-style finish, lower the heat and add 1 teaspoon honey and 1 teaspoon balsamic vinegar to the pan.
Let them bubble for about 20–30 seconds, then quickly spoon the mixture over the duck.
Do not leave the honey in the pan for long. It can caramelize and burn quickly.
Remove the duck from the skillet once it reaches your desired doneness.
Step 6: Rest, Slice, and Serve

Transfer the duck breasts to a clean cutting board and let them rest for 5 minutes.
This short rest gives the juices time to settle instead of running all over your cutting board.
Slice the duck diagonally into thin pieces.
Arrange the slices with the crispy skin facing upward so it stays crunchy.
Serve immediately with roasted vegetables, mashed potatoes, green beans, or a bright salad.
One last little kitchen trick: If the skin softens slightly while resting, don’t panic. The flavor is still there. Serve it right away and keep the sauce light so the crisp skin remains the star.
Health Benefits
Duck breast is a nutrient-dense protein, although it is naturally higher in fat than many lean poultry options.
Potential nutritional benefits include:
- High-quality protein: Supports muscle maintenance and overall body function.
- Iron: Duck provides iron, which is important for oxygen transport in the body.
- Vitamin B12: Helps support normal red blood cell formation and nervous system function.
- Zinc: Contributes to normal immune function and wound healing.
- Selenium: Provides an antioxidant mineral involved in normal thyroid function.
- Healthy fats: Duck contains a mixture of monounsaturated and saturated fats.
Because duck is rich, portion size matters. Pairing it with vegetables or a fresh salad creates a more balanced meal.
Nutrition Information (Per Serving)
Estimated nutrition based on 4 servings and may vary depending on the size of the duck breasts and how much rendered fat is consumed.
| Nutrient | Approximate Amount |
|---|---|
| Calories | 430 kcal |
| Protein | 33 g |
| Fat | 31 g |
| Carbohydrates | 3 g |
| Fiber | 0 g |
| Sugar | 2 g |
| Sodium | 650 mg |
Note: If most of the rendered duck fat is removed before serving, the actual calories and fat consumed may be lower.
Pro Tips & Variations
For Extra-Crispy Skin
- Start the duck in a cold skillet.
- Pat the skin completely dry.
- Score only the skin and fat layer.
- Cook slowly over medium-low heat.
- Pour off excess rendered fat during cooking.
Don’t Crowd the Pan
If you’re doubling the recipe, use two pans rather than squeezing four breasts into one skillet. Crowding traps moisture and makes browning harder.
Make It Citrus-Herb Style
Add a little orange zest with the thyme and rosemary. Orange and duck are a classic pairing for good reason.
Try a Cherry Glaze
Replace the honey-balsamic mixture with a quick sauce made from tart cherry preserves and a splash of balsamic vinegar.
Make It More Savory
Skip the honey and add a splash of chicken stock, a little Dijon mustard, and fresh thyme for a simple pan sauce.
Save the Duck Fat
Strain cooled rendered duck fat into a clean container and refrigerate it. It is excellent for roasting potatoes and root vegetables.
Don’t Cut Immediately
The temptation to slice right away is real, especially when the skin looks that good. Give the duck its full 5-minute rest.
How Much Does It Cost to Make?
Prices vary by location and duck availability, but this is a reasonable estimate for a U.S. home kitchen.
| Ingredient | Estimated Cost |
|---|---|
| 2 duck breasts | $14.00–$18.00 |
| Garlic | $0.30 |
| Fresh thyme & rosemary | $1.50 |
| Honey | $0.20 |
| Balsamic vinegar | $0.25 |
| Salt & pepper | $0.15 |
| Butter | $0.25 |
| Estimated Total | $16.65–$20.65 |
| Estimated Cost Per Serving | $4.15–$5.15 |
The price can vary significantly depending on whether you purchase fresh, frozen, specialty, or locally sourced duck.
Frequently Asked Questions
Should you cook duck breast skin-side up or down first?
Start skin-side down in a cold skillet. This gives the fat time to render slowly while the skin gradually becomes crisp and golden.
How do you get crispy skin on duck breast?
The most important steps are to dry the skin thoroughly, score it shallowly, start in a cold pan, and cook over medium-low heat. Avoid adding oil because the duck produces plenty of fat.
Can I cook duck breast without an oven?
Yes. A skillet is enough for this recipe. Once the skin is crisp, simply sear the meat side until it reaches your desired doneness and the appropriate food-safe internal temperature.
Why is my duck breast skin not crispy?
Usually, the problem is moisture, insufficient rendering, or heat that is too high. Pat the skin dry before cooking and give the fat time to render slowly. If the skin starts burning before the fat renders, lower the heat.
Final Thoughts
A great pan-seared duck breast doesn’t require restaurant equipment or complicated techniques. Dry skin, a cold pan, patient rendering, and a short rest do most of the work.
Once you hear that gentle sizzle and watch the skin turn deep golden brown, you’ll understand why duck is worth cooking at home. Pair it with something fresh and simple, pour yourself a favorite drink, and enjoy a dinner that feels special without turning your kitchen into a complicated project.