

Crispy duck wings are one of those recipes that make you wonder why you don’t cook duck more often. When you’re craving something deeply savory, juicy, and wonderfully crisp, these wings hit the spot. They have richer flavor than chicken wings, and when the fat renders properly, the skin turns beautifully golden and crackly. Best of all, you don’t need a deep fryer or complicated ingredients to make them at home.
The secret is simple: dry the wings well, season them generously, and give them enough time in a hot oven to render the fat and crisp the skin. Your kitchen may get a little messy along the way—that’s normal home cooking—but the payoff is a platter of irresistible wings with tender meat underneath. Serve them for game day, a casual dinner, or whenever a serious savory craving strikes.
Prep & Cook Time
| Details | Time |
|---|---|
| Prep Time | 15 minutes |
| Cook Time | 55–65 minutes |
| Resting Time | 5 minutes |
| Total Time | About 1 hour 20 minutes |
| Servings | 4 |
Recipe yield: About 12–16 duck wing pieces, depending on their size.
What Equipment Do You Need?
You only need a few basic kitchen tools:
- Large mixing bowl
- Paper towels
- Wire cooling rack
- Rimmed baking sheet
- Aluminum foil or parchment paper
- Small bowl for seasoning
- Tongs
- Instant-read meat thermometer
- Pastry brush, optional
Chef’s note: A wire rack is especially useful here because it allows hot air to circulate around the wings. That helps the skin crisp instead of sitting in rendered duck fat.
Ingredients
For the Duck Wings
- 2 lb (900 g) duck wings, separated at the joints if needed
- 1½ tsp kosher salt
- 1 tsp smoked paprika
- 1 tsp garlic powder
- ½ tsp onion powder
- ½ tsp freshly ground black pepper
- ½ tsp dried thyme
- ¼ tsp cayenne pepper, optional
- 1 tbsp baking powder, preferably aluminum-free
- 1 tbsp olive oil
Optional Finishing Sauce
- 2 tbsp honey
- 1 tbsp soy sauce
- 1 tbsp rice vinegar
- 1 tsp sesame oil
- 1 small garlic clove, finely grated
- ½ tsp grated fresh ginger
- 1–2 tsp hot sauce, optional
For Garnish
- Sliced green onions
- Toasted sesame seeds
- Fresh cilantro or parsley
- Lemon or lime wedges
Why Each Ingredient Matters
Duck wings: Duck has more natural fat than chicken, which gives the meat a rich flavor while helping the skin become beautifully crisp as the fat renders.
Kosher salt: Salt does more than add flavor. It helps season the meat and draws a little moisture from the surface, which is helpful when you’re chasing crispy skin.
Baking powder: This is a classic crispy-wing trick. A small amount raises the surface pH and helps the skin brown and dry out during roasting. Make sure you’re using baking powder, not baking soda.
Smoked paprika: Adds gentle smokiness and gives the wings an appealing roasted color.
Garlic and onion powder: These provide savory depth without adding moisture to the wings.
Black pepper and cayenne: Pepper adds warmth, while cayenne gives the optional finishing heat. You can easily leave the cayenne out for a milder batch.
Dried thyme: Its earthy, slightly floral flavor works particularly well with rich duck meat.
Olive oil: Only a small amount is needed to help the dry seasoning coat the wings. Duck will render plenty of its own fat during cooking.
Honey, soy sauce, vinegar, ginger, and garlic: Together, these create a sweet, salty, tangy, aromatic glaze. The vinegar keeps the sauce from tasting overly sweet.
Step-by-Step Instructions
Step 1: Dry and Prepare the Duck Wings
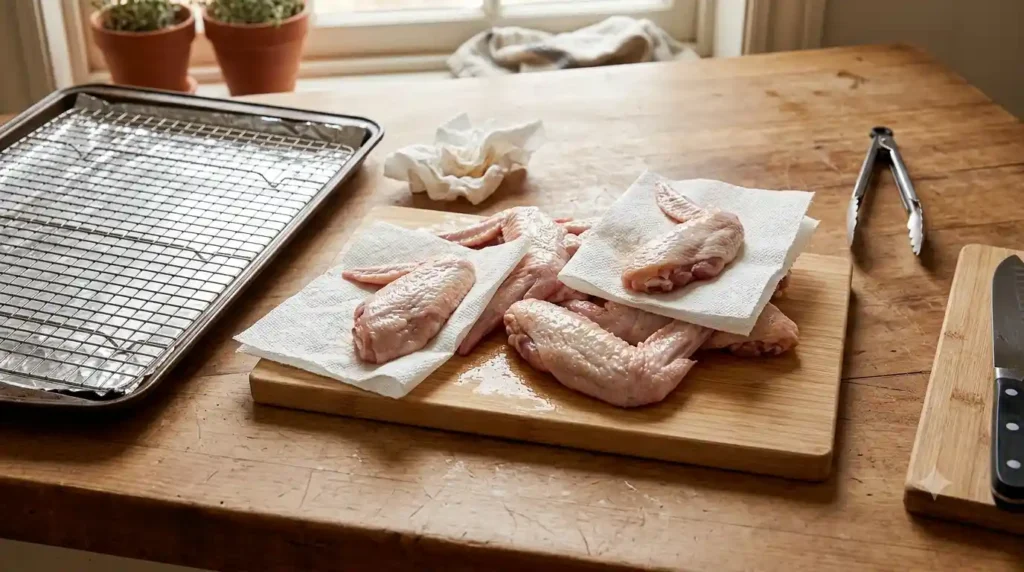
Preheat your oven to 425°F (220°C).
Line a rimmed baking sheet with foil for easier cleanup. Place a wire rack over the sheet and lightly brush or spray the rack with oil.
Pat the duck wings very thoroughly dry with paper towels. Don’t rush this step. Moisture is one of the biggest enemies of crisp skin.
If the wings are whole, separate them at the joints with a sharp knife. Trim away any large loose pieces of skin or excess fat, but don’t remove all the fat because it helps keep the meat flavorful.
Step 2: Season the Wings
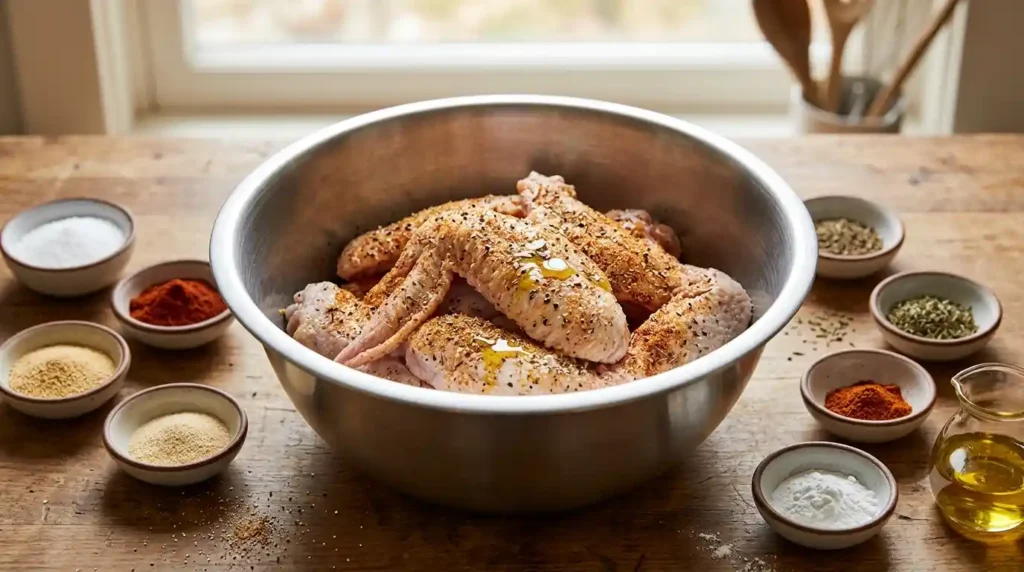
Place the dried wings in a large bowl.
Add:
- 1½ tsp kosher salt
- 1 tsp smoked paprika
- 1 tsp garlic powder
- ½ tsp onion powder
- ½ tsp black pepper
- ½ tsp dried thyme
- ¼ tsp cayenne, if using
- 1 tbsp baking powder
- 1 tbsp olive oil
Toss thoroughly until every wing is evenly coated.
For even better seasoning, let the wings sit uncovered in the refrigerator for 30 minutes to several hours. This extra time helps the salt penetrate the meat and dries the surface further.
If you’re short on time, you can cook them immediately.
Step 3: Arrange and Start Roasting
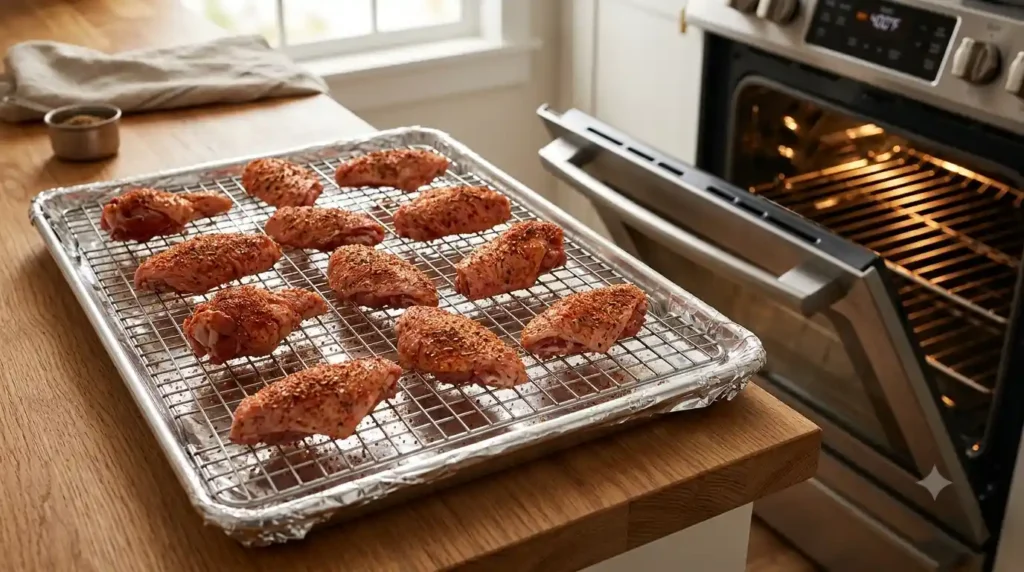
Arrange the wings on the wire rack in a single layer, leaving a little space between each piece.
Don’t pile them together. Crowding traps steam, and steam makes it much harder to get that crisp texture you’re after.
Place the baking sheet in the center of the preheated oven.
Roast for 30 minutes.
At this point, you’ll usually see some duck fat collecting underneath the rack. That’s completely normal.
Kitchen safety: Duck fat becomes extremely hot. Use oven mitts and keep your face and hands away from escaping steam when removing the baking sheet.
Step 4: Turn and Continue Cooking
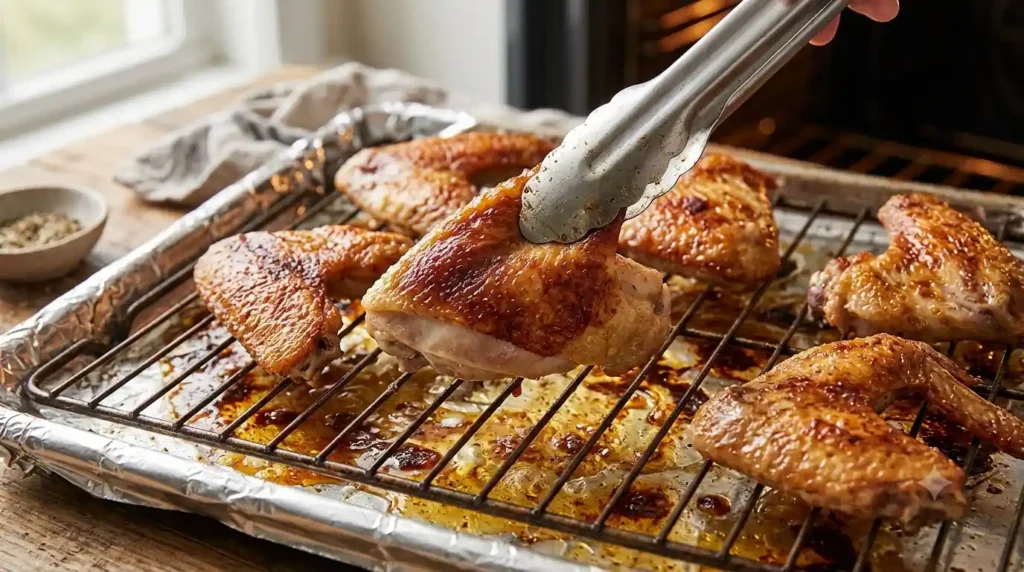
After 30 minutes, carefully remove the baking sheet and turn the wings with tongs.
Return them to the oven and roast for another 20–30 minutes, depending on their size.
Start checking around the 50-minute mark. The wings should be deeply golden, with visibly crisp skin and meat that has pulled back slightly around the bones.
For food safety, check the thickest part of the meat with an instant-read thermometer. Poultry should reach at least 165°F (74°C) internally.
If the wings are cooked through but the skin needs more color, increase the oven temperature to 450°F (230°C) for the final 5–8 minutes. Watch them closely because the rendered fat and spices can brown quickly.
Step 5: Make the Optional Glaze

While the wings finish cooking, combine the following in a small saucepan:
- 2 tbsp honey
- 1 tbsp soy sauce
- 1 tbsp rice vinegar
- 1 tsp sesame oil
- 1 grated garlic clove
- ½ tsp fresh ginger
- 1–2 tsp hot sauce, if desired
Warm over low heat for 2–3 minutes, stirring until the mixture is glossy and slightly thickened.
Don’t boil it aggressively. Honey can burn quickly.
For the crispiest wings, serve the glaze on the side or drizzle it lightly over the wings just before serving. Coating the wings heavily can soften that beautiful crisp skin.
Step 6: Rest and Serve
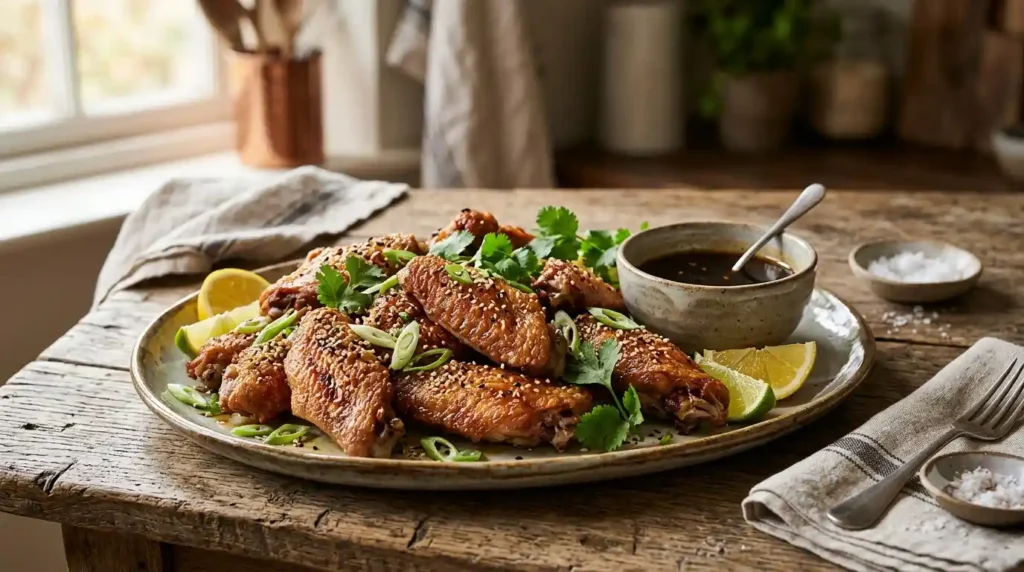
Transfer the crispy duck wings to a clean serving platter.
Let them rest for about 5 minutes before serving. This gives the juices a moment to settle without giving the skin enough time to become soggy.
Finish with sliced green onions, sesame seeds, fresh herbs, and a squeeze of lemon or lime.
Serve immediately while the skin is at its crispiest.
Health Benefits
Duck wings are an indulgent food, but they also provide useful nutrients when enjoyed as part of a balanced meal.
- High-quality protein: Duck provides protein that supports muscle maintenance and normal body functions.
- Iron: Duck meat contains iron, which is important for healthy red blood cell production.
- Zinc: Zinc supports normal immune function and several metabolic processes.
- Vitamin B12: Duck provides vitamin B12, a nutrient involved in red blood cell formation and neurological function.
- Selenium: This mineral helps protect cells from oxidative stress and supports normal thyroid function.
That said, duck wings are naturally higher in fat than many skinless poultry options. If you’re watching your saturated fat or calorie intake, enjoy a moderate portion and pair the wings with vegetables, salad, or another high-fiber side.
Nutrition Information (Per Serving)
Approximate values based on four servings and the dry-seasoned wings, before optional glaze and garnishes.
| Nutrient | Approximate Amount |
|---|---|
| Calories | 520 kcal |
| Protein | 34 g |
| Fat | 40 g |
| Carbohydrates | 5 g |
Note: Nutrition can vary considerably depending on the size of the wings, how much rendered fat is consumed, and whether the optional glaze is used.
Pro Tips & Variations
For Extra-Crispy Skin
Dry the wings extremely well. This is more important than adding extra oil.
For the crispiest possible result, season the wings and leave them uncovered in the refrigerator for several hours or overnight. The refrigerator’s dry air helps remove surface moisture.
Don’t Add Too Much Oil
Duck already contains plenty of natural fat. A tablespoon of olive oil is enough to help distribute the seasoning.
Adding lots of oil can actually make the skin feel greasy instead of crisp.
Use a Wire Rack
If you place the wings directly on a flat baking sheet, the bottoms can sit in rendered fat. A rack keeps the wings elevated and allows hot air to circulate.
Make Them Spicy
Add more cayenne to the seasoning or increase the hot sauce in the glaze.
You can also add a pinch of crushed red pepper flakes to the finishing sauce.
Make Them Sweet and Sticky
Increase the honey to 3 tablespoons and add an extra splash of rice vinegar. Toss the cooked wings lightly with the sauce right before serving.
Try an Asian-Inspired Version
Skip the smoked paprika and thyme. Instead, season with garlic powder, white pepper, and a little five-spice powder. Finish with soy sauce, honey, ginger, sesame oil, and green onions.
Make Them Herbier
Add ½ teaspoon dried rosemary or a little finely chopped fresh rosemary to the seasoning mixture.
Don’t Want a Sauce?
No problem. These wings are flavorful enough to serve straight from the oven with lemon wedges and a simple dipping sauce.
How Much Does It Cost to Make?
Prices vary by location and where you buy duck, but here’s a reasonable estimate for a U.S. home kitchen.
| Ingredient | Estimated Cost |
|---|---|
| 2 lb duck wings | $10.00–$14.00 |
| Seasonings | $1.00–$2.00 |
| Olive oil | $0.25 |
| Optional glaze | $1.50–$2.50 |
| Garnishes | $0.75–$1.50 |
| Estimated Total | $13.50–$20.25 |
That works out to roughly $3.40–$5.10 per serving for four servings.
Duck wings can be more expensive than chicken wings, but the richer flavor means you don’t need a complicated side dish or a large amount of sauce to make the meal feel special.
Frequently Asked Questions
Are duck wings good for making crispy wings?
Yes. Duck wings are particularly well suited to roasting because they contain plenty of natural fat. As they cook, that fat renders and helps the skin become deeply golden and crisp.
The most important things are drying the wings thoroughly, avoiding overcrowding, and using a wire rack.
How long should I cook duck wings in the oven?
At 425°F (220°C), duck wings generally need about 50–60 minutes, depending on their size. Turn them halfway through cooking and use a meat thermometer to confirm that the thickest portion reaches at least 165°F (74°C).
Larger wings may need additional cooking time.
Should I boil duck wings before roasting?
No. Boiling isn’t necessary for this recipe.
Starting with dry, well-seasoned wings and roasting them at a high temperature allows the duck fat to render naturally while the skin becomes crisp.
How do I keep duck wings crispy after cooking?
Serve them as soon as possible after roasting.
If you’re preparing them ahead, keep them uncovered rather than sealing them in a container while they’re still hot. Trapped steam will soften the skin.
For leftovers, reheat them in a 400°F (205°C) oven or air fryer until hot and crisp again. Avoid microwaving if crispy skin is your goal.
Final Thoughts
If you’ve only ever made chicken wings, these crispy duck wings are a fun upgrade worth trying. The meat is rich and juicy, the rendered duck fat gives the skin incredible flavor, and a simple seasoning blend is all you need to get started.
Take your time drying the wings, don’t crowd the pan, and let the oven do the hard work. Once you pull out that golden, crackling batch, you’ll understand why duck wings deserve a regular spot in the home-cooking rotation.